
|
|
 |
|
|
|
Welcome to the Australian Ford Forums forum. You are currently viewing our boards as a guest which gives you limited access to view most discussions and inserts advertising. By joining our free community you will have access to post topics, communicate privately with other members, respond to polls, upload content and access many other special features without post based advertising banners. Registration is simple and absolutely free so please, join our community today! If you have any problems with the registration process or your account login, please contact us. Please Note: All new registrations go through a manual approval queue to keep spammers out. This is checked twice each day so there will be a delay before your registration is activated. |
|
|||||||
| Project Builds (non Car) Here is an area where you can show / discuss other non car builds be they bikes, caravans, boats, BBQ's or whatever. |
 |
|
|
Thread Tools | Display Modes |
|
|
#1 | ||
|
Cabover nut
Join Date: Aug 2015
Location: Onsite Eastcoast
Posts: 11,324
|
This one is from a few years back now. (so please excuse the picture quality)
This is the story of the 2nd motorhome I had built from a truck, (that's another story) used for 10 years while working up and down the Eastcoast and deciding to retire it from the road in a dignified way. Part 1 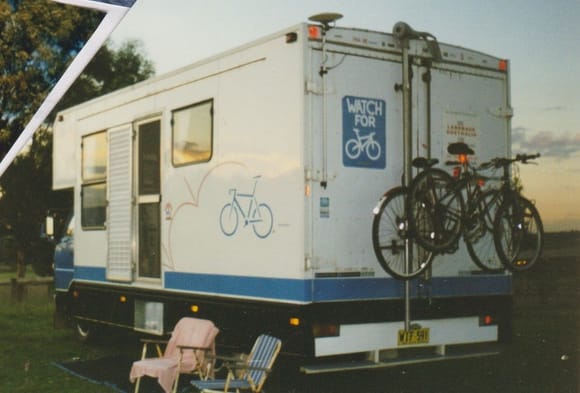 ] ]Living aboard a boat in NSW and previously finding ourselves a big annual site in a little caravan park for the now well used truck MH, out of necessity I needed a base in NE Victoria due to the amount of contract stonework. The nice then owner of the park gave us a huge corner plot with an ensuite then told us we were free to do whatever we liked. 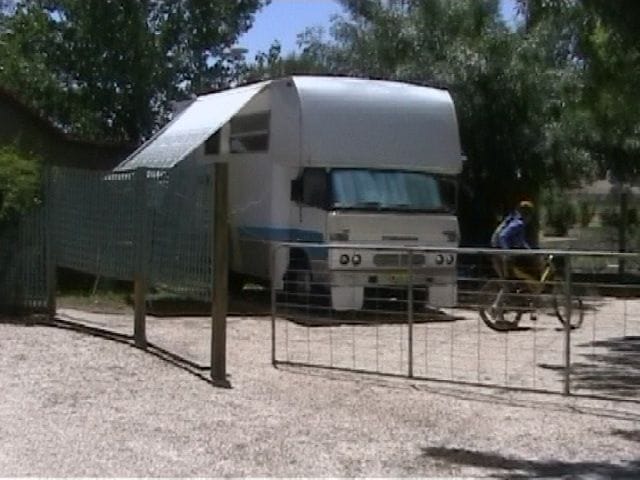 The so called simply plan was to take the already converted body off the chassis and use as is but ideas sorta got in the way. In the meantime I could build the 3rd motorhome (current one) here at the same time. 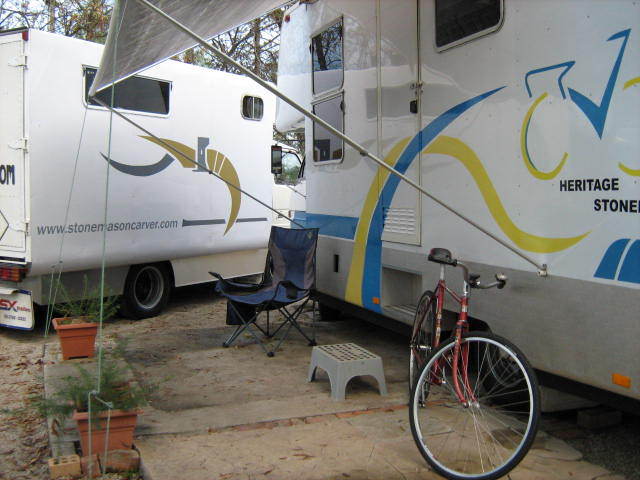 The rusty poor old Daihatsu cab chassis was worn out after years of pulling this heavy pantec body up and down mountains. So I proceeded to pull the lower side skirts off of it and prepare it to be set up on piers. 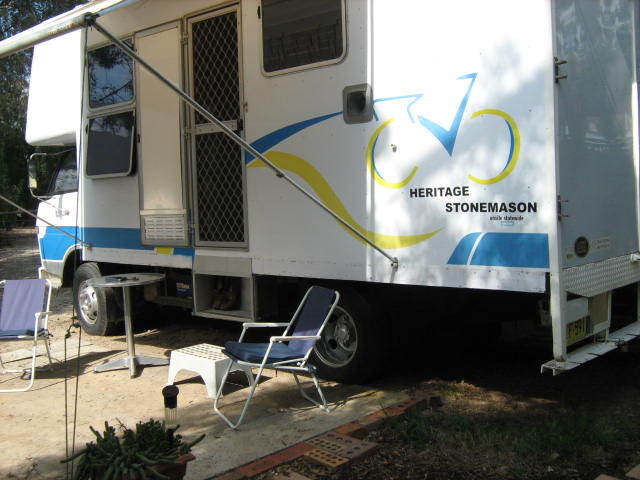 I set the block piers so it would take advantage of the lovely shade trees and look out over the surrounding foothills towards Mt Buffalo. Everything under the floor had to be disconnected and moved to allow a crane to come in a lift the body off the chassis, swing it 90deg and land it on the piers in a tight area. 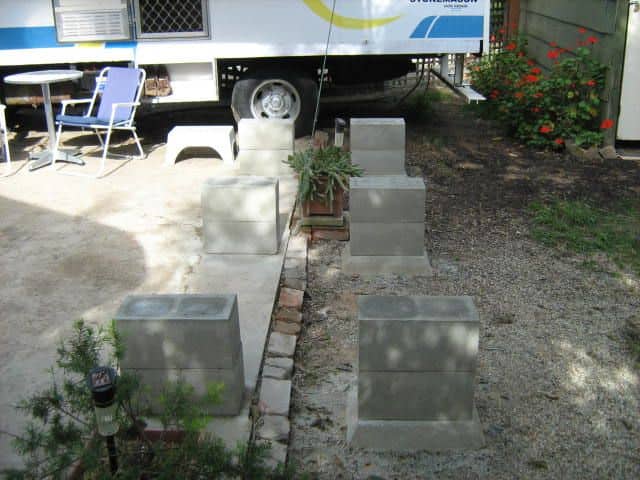 He did managed to position it exactly where I wanted it so I could hook up power and water lines as before. 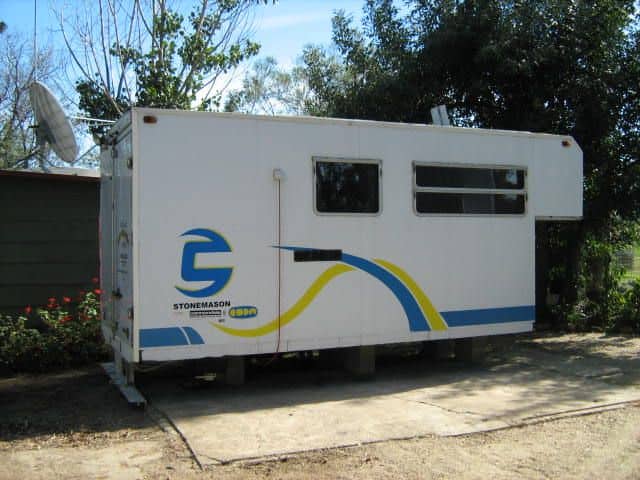 The trucks rusty cab was bogged up and a local transport company bought it off me and serves as their yard water truck still. 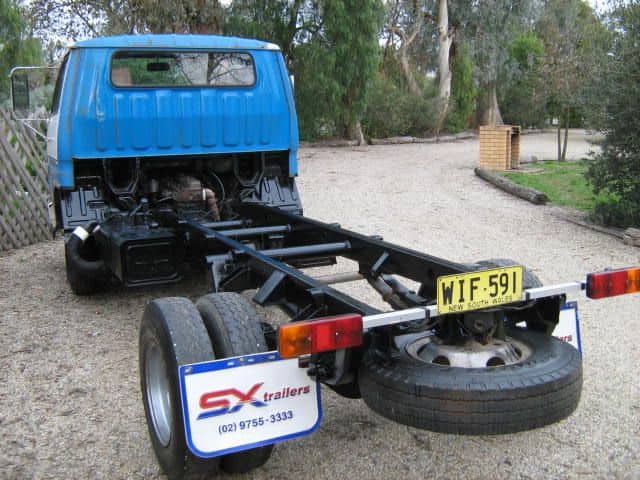 Some decorative gravel and pavers prettied the walkway up from the gate. Give it a little garden granite wall and job done.....but..... 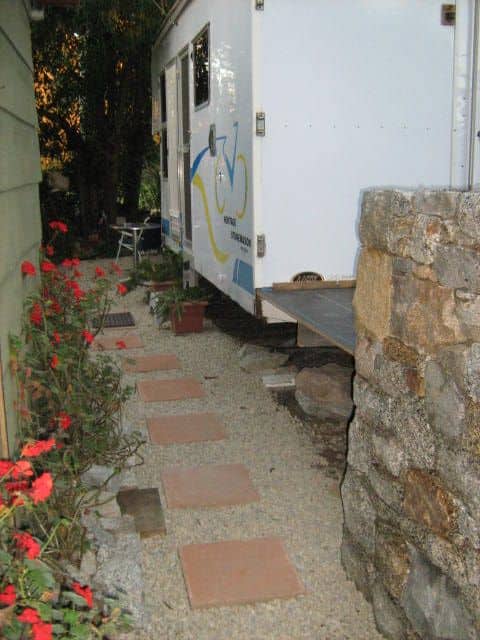 I got to thinking ???? Why not make it bigger. Stay tuned for part 2.
__________________
heritagestonemason.com/Fordlouisvillerestoration In order that the labour of centuries past may not be in vain during the centuries to come...... D. Diderot 1752
|
||
|
|

|
| 13 users like this post: |
|
|
#2 | ||
|
Critical Thinker
Join Date: Jan 2005
Location: Adelaide
Posts: 20,386
|
Subscribed
__________________
"the greatest trick the devil pulled, is convincing the world he doesn't exist" 2022 Mazda CX5 GTSP Turbo 2018 Hyundai Santa Fe Highlander 1967 XR FALCON 500 Cars previously owned: 2021 Subaru Outback Sport 2018 Subaru XV-S 2012 Subaru Forester X 2007 Subaru Liberty GT 2001 AU2 75th Anniversary Futura 2001 Subaru GX wagon 1991 EB XR8 1977 XC Fairmont 1990 EA S Pak 1984 XE S Pak 1982 ZJ Fairlane 1983 XE Fairmont 1989 EA Falcon 1984 Datsun Bluebird Wagon 1975 Honda Civic |
||
|
|

|
|
|
#3 | ||
|
Cabover nut
Join Date: Aug 2015
Location: Onsite Eastcoast
Posts: 11,324
|
Part 2
Now having the basic idea in my head sorted, work started........ We wanted to be able to have a fixed normal floor level bed, which wasn't possible with it's current layout of overcab bed. Another aim was to use as much recycled materials I could reuse or source locally. Seemed logical to extend the floor space, move the front mounted bed. The old conversion was set up with a workshop and storage area behind the rear barn doors with the bathroom forward of that. Kitchen midships and lounge forward under hinged down bed. The new bedroom would be located at the rear where the workshop area was. I could build a timber frame floor level out from the back barn doors and keep them fitted during the construction to keep it watertight. The freestanding granite wall would act as a boundary wall for us, as well as the internal feature wall for the little bedroom. Another plus was it acted as a thermal wall during summer as it was directly in line with the setting summer sun. Leaving little openings in the wall (putlocks) received the beams ends to tie the floor in. 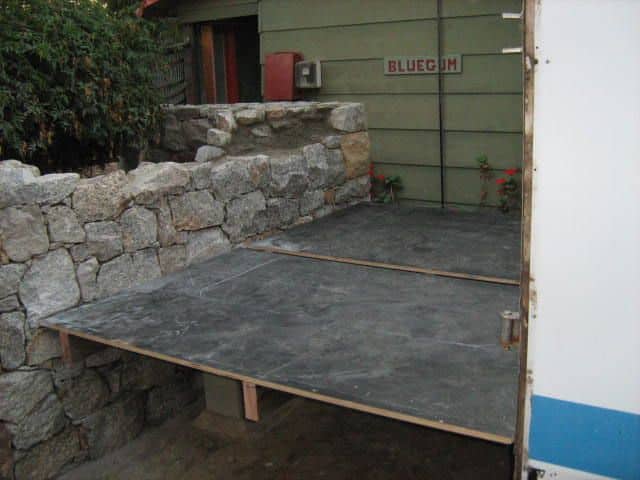 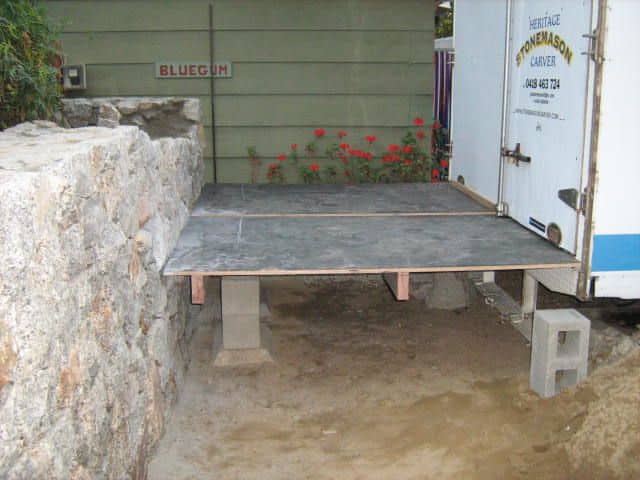 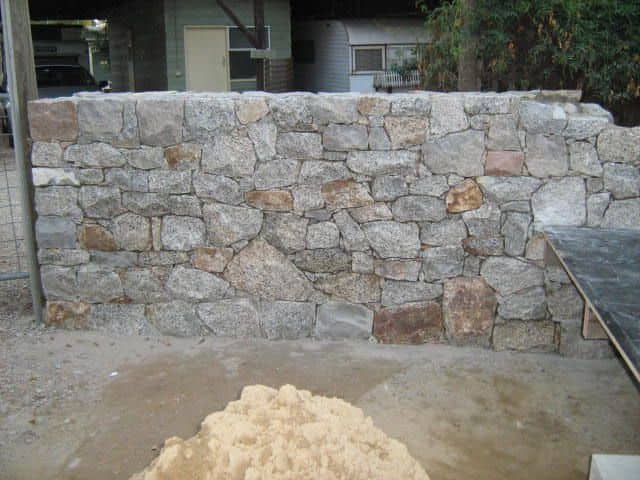 As I casually built the wall between other jobs. We wanted to have a rounded roof and little observation (tea) room which as previously stated, looked towards Mt Buffalo. The top platform and shape was basically 18mm formply as it was strong and didn't need extra finishing, a couple of local demolition windows used. Next I ordered the curved Zincalume roof sheets at (12ft) 3.6mt span to allowing for an overhang. it was handy still having the old cab chassis to pick it up. 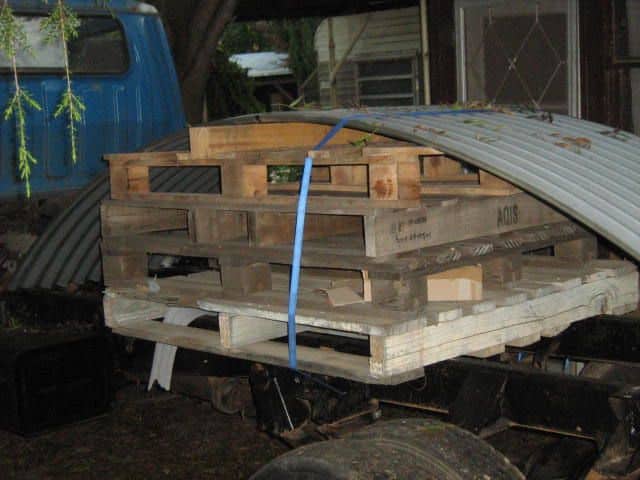 Long demo Oregon 4" X 2" timber lengths were screwed to the outside top edge of the sides so the curved roofing cound be then screwed down to it. At 900m intervals a formply bulkhead was installed crossways to add strength to the curve. 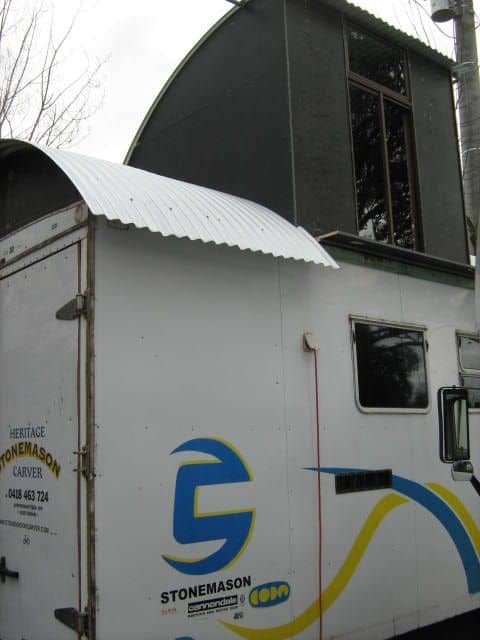 A new cladding was decided upon using thin marine ply simply sanded and coated in Deks Olje (a traditional marine tung oil coating) which acts like spar varnish and can handle dry summers here. Best of all it doesn't need stripping down every time a re coat is applied. I had plenty from the boat. The cladding needed an air gap so it was best affixed with more CD ply battens stood off the original cargosheet cladding I used 10 years previous. 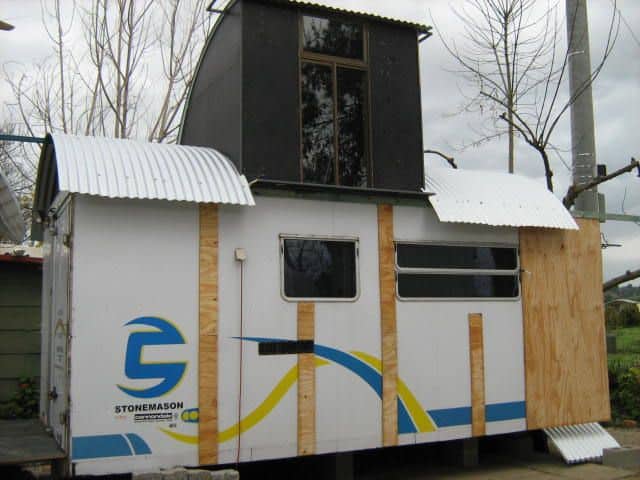 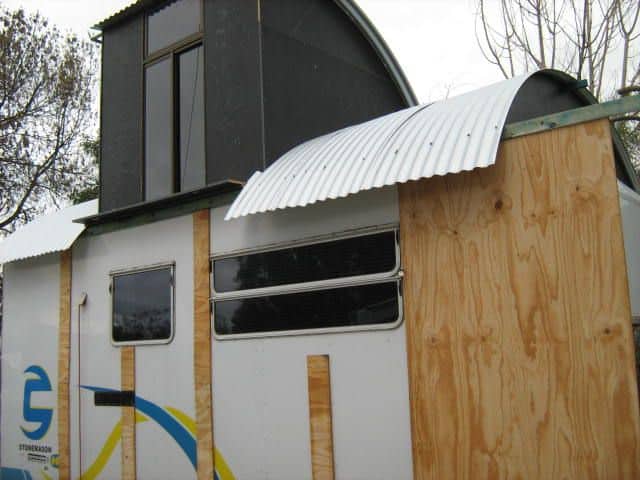 Work progressed nicely on the top section ply coatings as they were big (8 X 4) 2440 x 1220mm pieces. Timber boxing around the caravan type windows was necessary to allow for a recessed look and I couldn't be bothered pulling windows out and reinstalling them. The bottom cladding would be mini orb sheeting from the same local steel suppliers and just a matter of tek screwing them on. 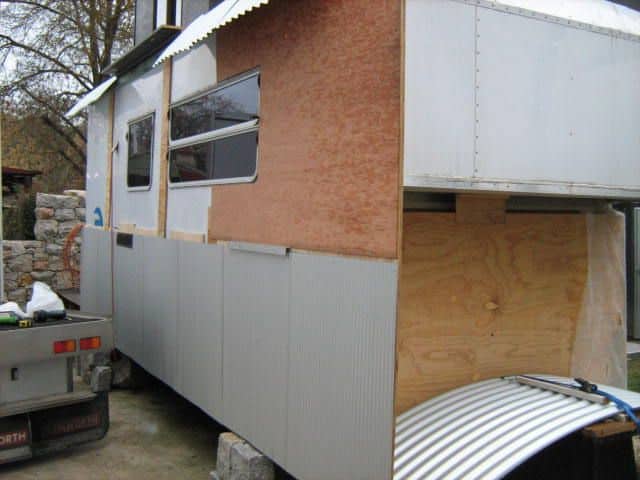 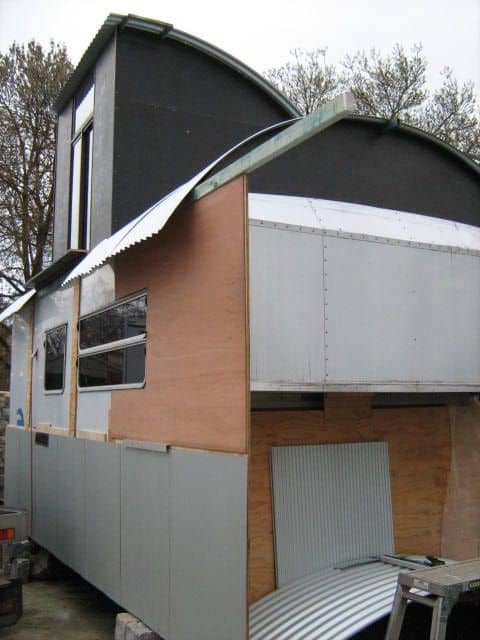 It was back down to the demo yard to find a steel ?? belt line joiner between top and bottom cladding. Aluminium U in long lengths was the decider (due to price mainly.) 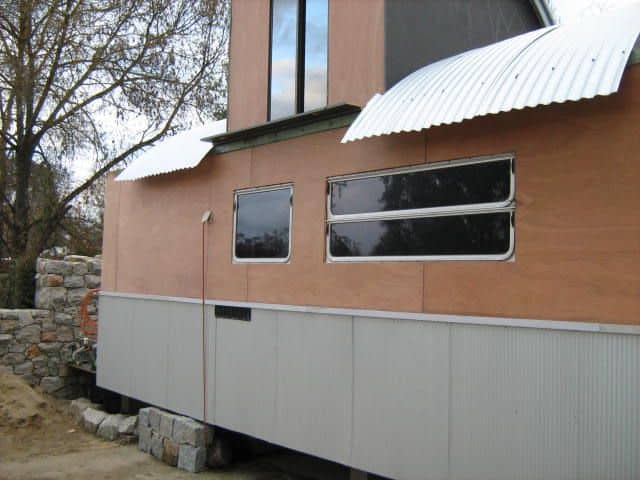 The freestanding bedroom wall grew as this was taking shape. 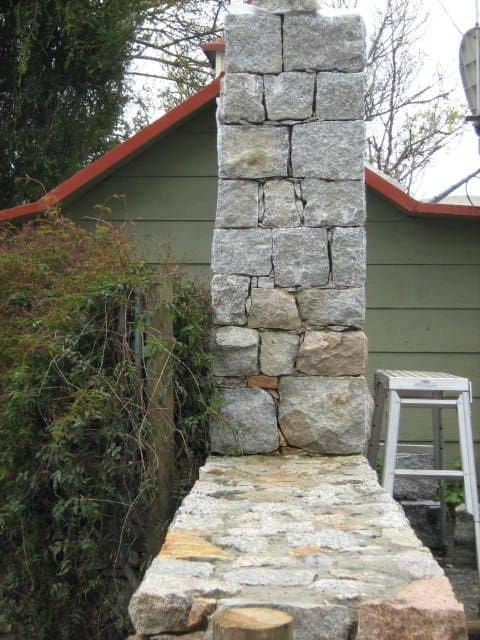 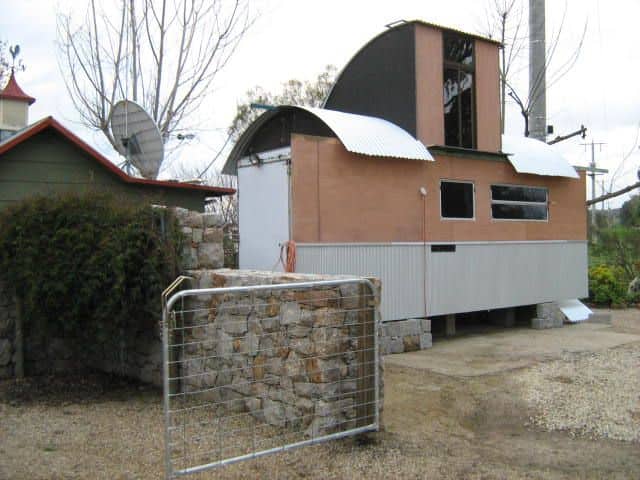 With most of the cladding done in the middle now it was time to work out the ends. The front needed a porch and doorway, while the back needed a roof spanning back to the stonework. see you for part 3. for the ramshackle cheap ar*e cabin.
__________________
heritagestonemason.com/Fordlouisvillerestoration In order that the labour of centuries past may not be in vain during the centuries to come...... D. Diderot 1752
|
||
|
|

|
| 9 users like this post: |
|
|
#4 | ||
|
Cabover nut
Join Date: Aug 2015
Location: Onsite Eastcoast
Posts: 11,324
|
PART 3
I'll continue this thread in between building the next cabin project currently underway. Progress on the freestanding wall continued with squaring up Harcourt blocks needed for the corners and ends. 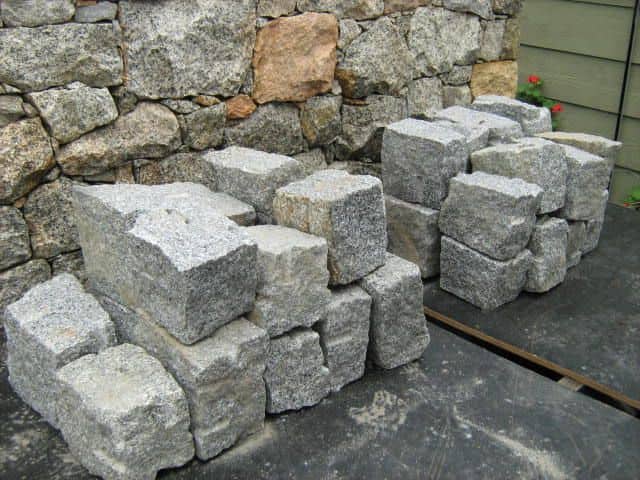 As the wall grew, I could then span the gap with roof beams to tie into the granite. Allowing the original pantec MH body to be connected as one unit. 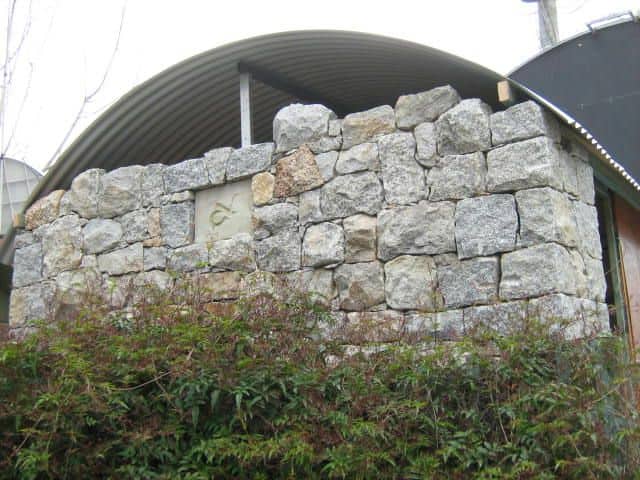 My mason's mark I like to add to every stone job I build. 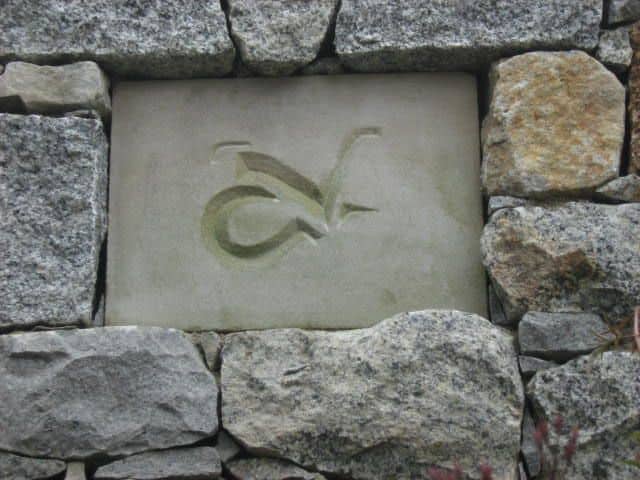 With the curved roofing secure, it was time to fill in the gap. Simple CD ply and timber framing was built as the side walling for the small bedroom running 12v wiring through these panels with wool insulation followed by the continuation of the side cladding to finish. 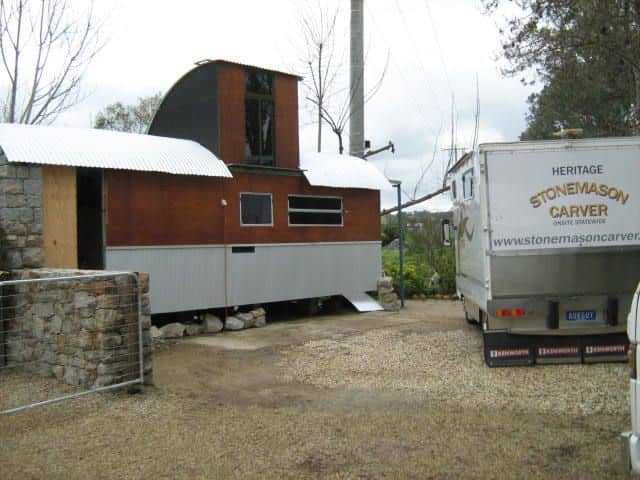 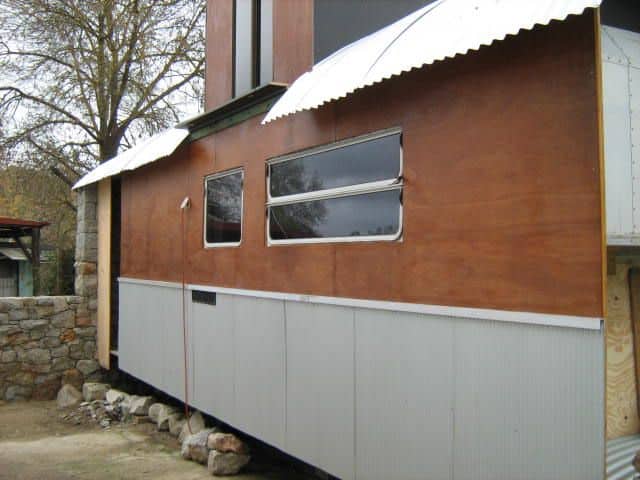 The front sheet metal of the luton peak was cut for the flooring and sides to extent and allow a front glass side panel door I had been storing. The door was a nice old one I picked up years ago when the house I rented was demolished and kept it stored or years. (now on the new cabin too) A small front porch was built to view the paddocks next door. As with most of the panels above I used formply for the door side filler panels, bulkhead above with timber frame and roofing offcuts to form the front awning. 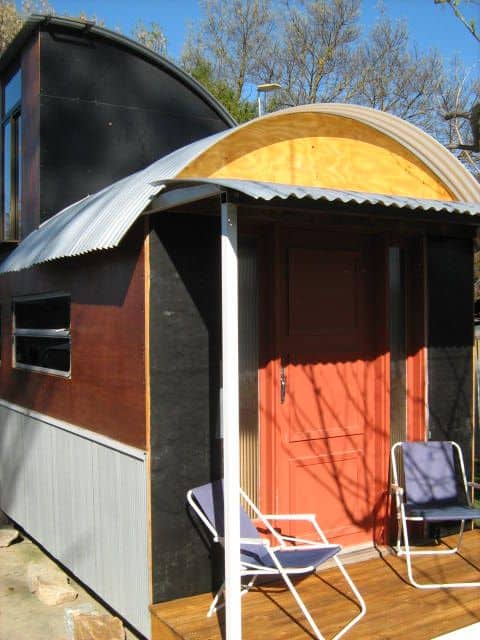 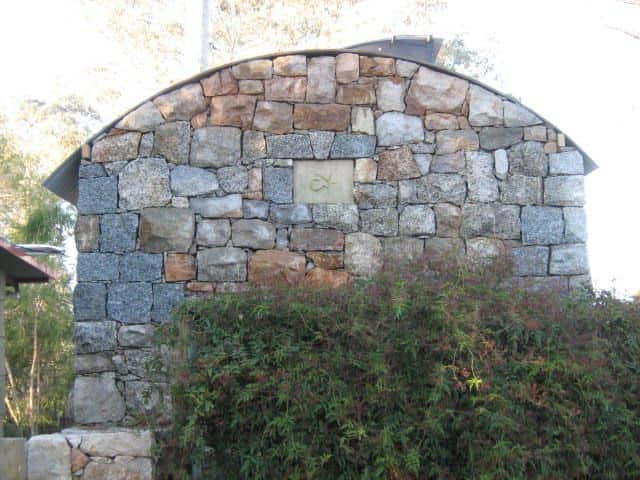 Back wall completed and side wall panels done, sans trim. I source a used matching caravan window for the little bedroom. 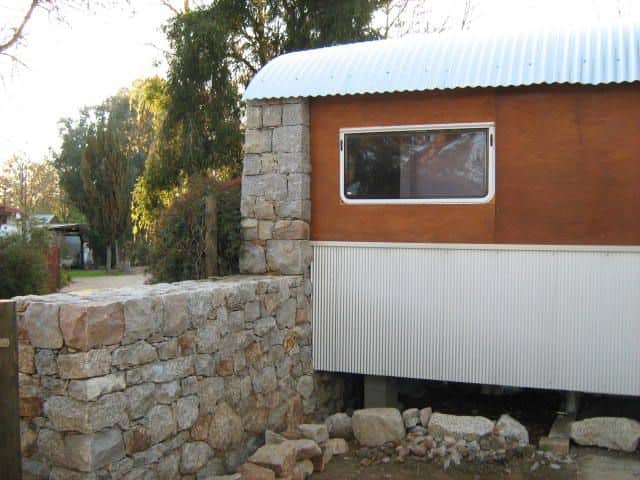 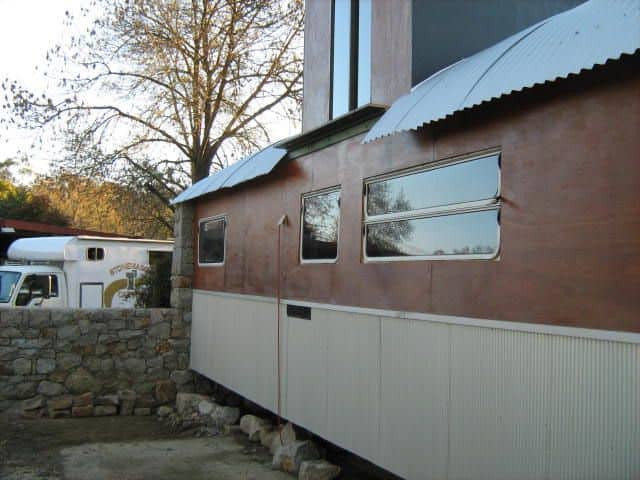 Inside a mantel shelf was placed just to break up the stonework. 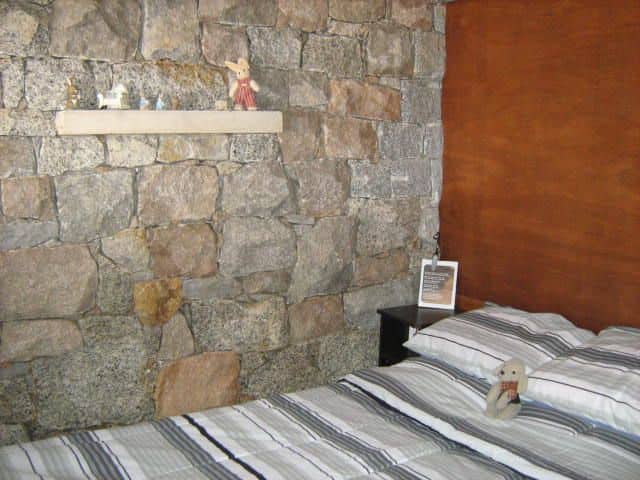 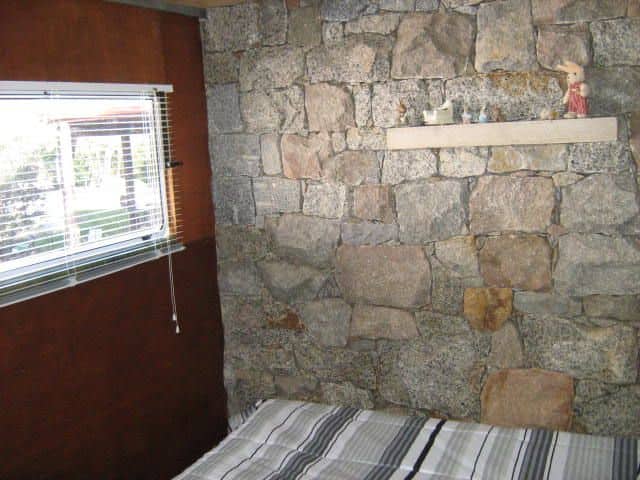 Overall this little place was a great base we initially set up until I later bought land down the road. 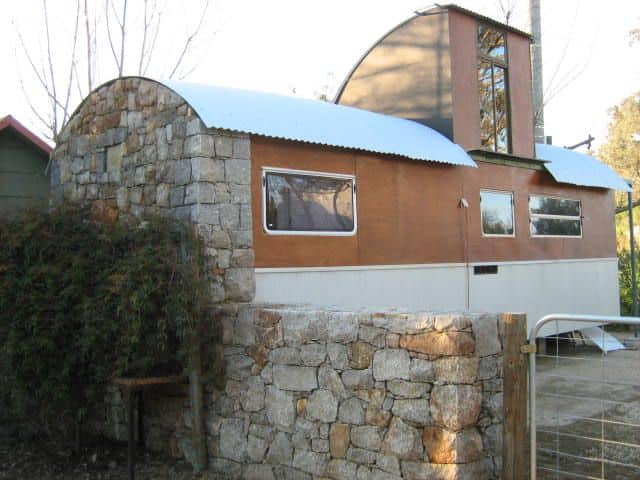 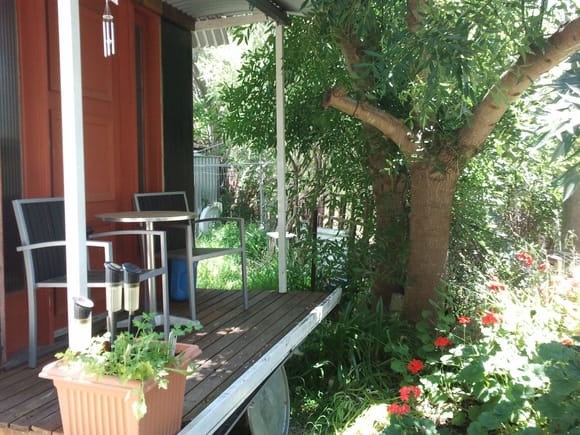 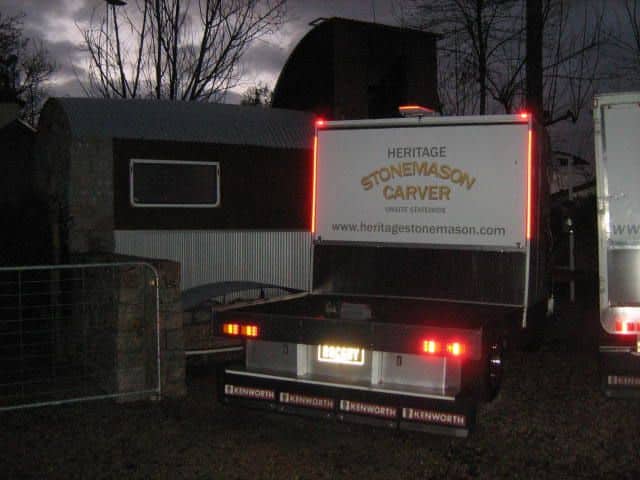
__________________
heritagestonemason.com/Fordlouisvillerestoration In order that the labour of centuries past may not be in vain during the centuries to come...... D. Diderot 1752
|
||
|
|

|
|
|
#5 | ||
|
Donating Member
 Join Date: May 2008
Posts: 12,689
|
Great work.
Do you have an apprentice? Would be a shame to not pass on your skills to another generation.
__________________
PX MK II Ranger FG XR6 FG X XR8 Mustang GT T3 TS50 - gone but not forgotten |
||
|
|

|
|
|
#6 | |||
|
Cabover nut
Join Date: Aug 2015
Location: Onsite Eastcoast
Posts: 11,324
|
Quote:
Yep sound easy but convincing an offsider to live on the road with their own accommodation, not so.
__________________
heritagestonemason.com/Fordlouisvillerestoration In order that the labour of centuries past may not be in vain during the centuries to come...... D. Diderot 1752
|
|||
|
|

|
| 5 users like this post: |
|
|
#7 | ||
|
Cabover nut
Join Date: Aug 2015
Location: Onsite Eastcoast
Posts: 11,324
|
As a side note to this build.....
After we had lived in it for a few years the nice owner had to sell the little caravan park. The new owner that came in (with all the big plans) decided that he wanted all the annual sites cleared but wanted my stonewall left. I would have just given it to him but he turned out to be such a huge a***hole most annual tourist left anyway. It was time to recycle everything yet again. These pictures are of the IPEC delivery body I converted into the motorhome from a flatbed Daihatsu Delta. Body cut and fitted to cab chassis. 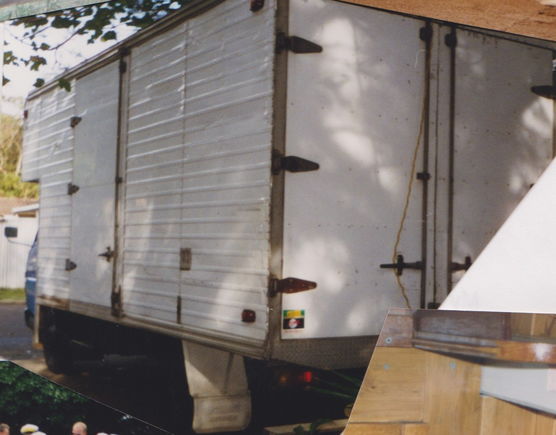 Cladding mid fitout. 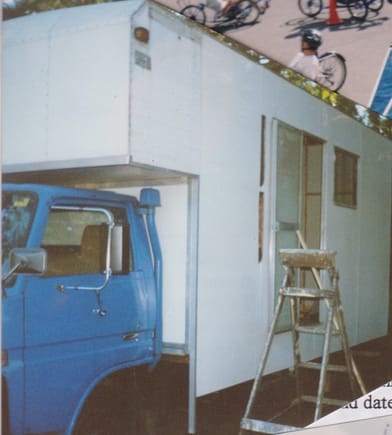 In use at the start. 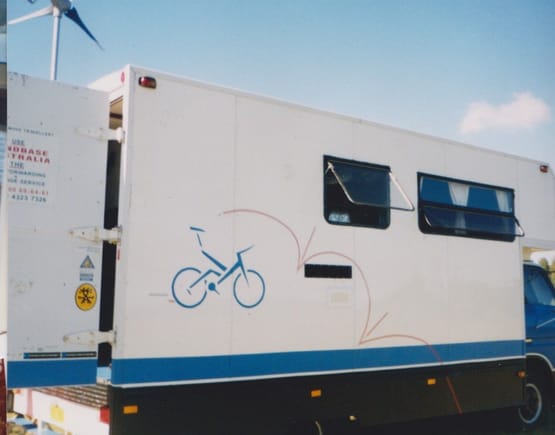 Timing was perfect, as I was pulling the stone wall apart I needed several loads of the granite up at a local job at Silver Creek. The current boundary walling on this property (below) was my original feature wall of the little cabin. Quite a few bits and pieces have found their way into the build of my new cabin still under construction including the nice flute glass doorway from years ago. 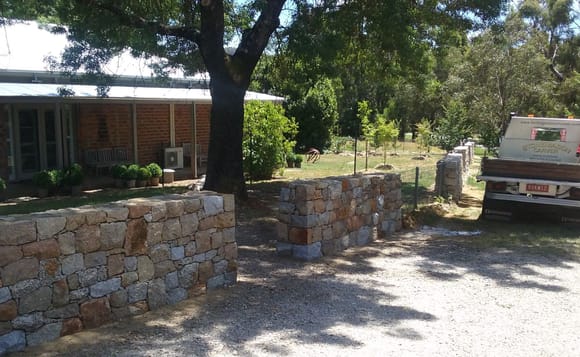 As for the pantec body, across the road from the caravan park was a rural supply where a young guy who raced motorcross worked, he was looking at converting a truck body into his accommodation and transport of his bikes to race meeting. A deal was struck where I didn't even have to remove it, the last I heard he had it on another cab chassis and was refitting it out again.
__________________
heritagestonemason.com/Fordlouisvillerestoration In order that the labour of centuries past may not be in vain during the centuries to come...... D. Diderot 1752
|
||
|
|

|
|
|
#9 | ||
|
Cabover nut
Join Date: Aug 2015
Location: Onsite Eastcoast
Posts: 11,324
|
Yes, everyone took their bat and ball.
No one stays there much now, he ruined it.
__________________
heritagestonemason.com/Fordlouisvillerestoration In order that the labour of centuries past may not be in vain during the centuries to come...... D. Diderot 1752
|
||
|
|

|
|
|
#12 | ||
|
FF.Com.Au Hardcore
Join Date: Dec 2004
Location: Perth
Posts: 1,794
|
Wow, that was a great home build.
__________________
Current Rides: 2017 Ford Mustang 2020 Ford Everest Sport Past Rides: 2017 Kia Stinger GT 2008 FG XR6 Sedan 2008 FG G6E Sedan 2004 BA XR8 Sedan 2008 BF XR6 Turbo Sedan 2004 BA XR8 Sedan 2003 BA XR8 Ute 2003 BA XR6 Sedan |
||
|
|

|
| This user likes this post: |