
|
|

|
|
|
|
Welcome to the Australian Ford Forums forum. You are currently viewing our boards as a guest which gives you limited access to view most discussions and inserts advertising. By joining our free community you will have access to post topics, communicate privately with other members, respond to polls, upload content and access many other special features without post based advertising banners. Registration is simple and absolutely free so please, join our community today! If you have any problems with the registration process or your account login, please contact us. Please Note: All new registrations go through a manual approval queue to keep spammers out. This is checked twice each day so there will be a delay before your registration is activated. |
|
|||||||
 |
|
|
Thread Tools | Display Modes |
 17-02-2009, 05:41 PM
|
#1 | |||
|
AU DIE HARD
  
Join Date: Nov 2005
Location: Between 2nd and 5th gear
Posts: 5,073
 
|
With my XR not holding in the driveway on the park brake thought I would have a bit of a look and adjust
 : What a :sm_headba : What a :sm_headba Did the usual search but not with much luck so have deciede to put it all on one page Step 1 Place car on level ground and chock front wheels both ways to avoid rolling in either direction.release handbrake and place in neutral Step 2 For minor ajustments, this can be done from inside the car, the adjuster is located at the base of the hand brake handle. This can be seen clearly by removeing the cover . 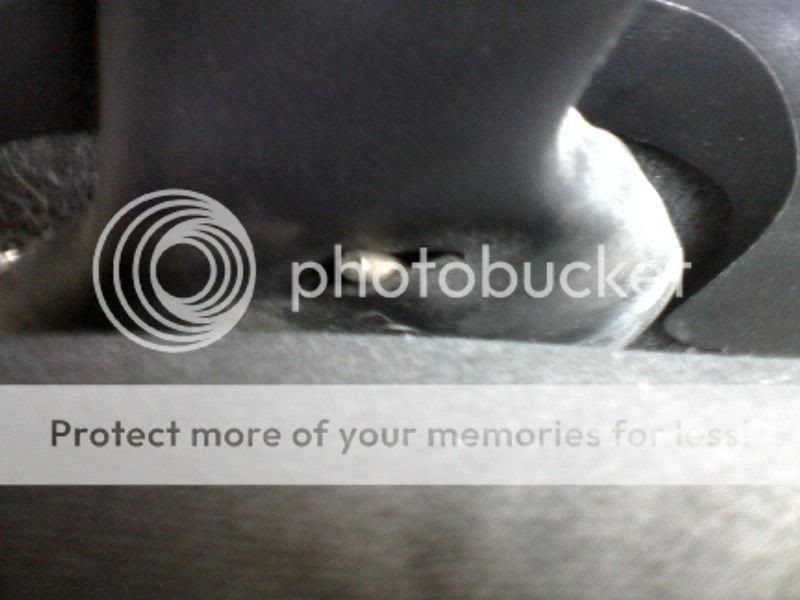 . 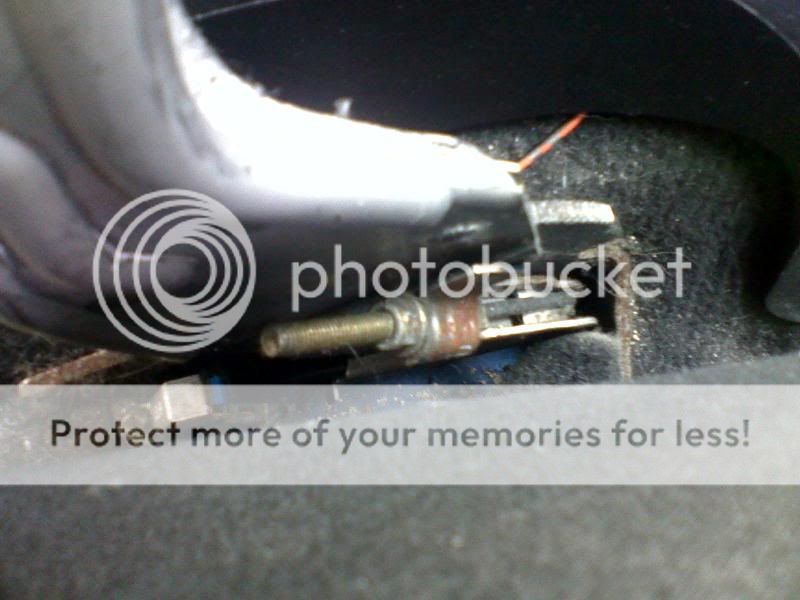 release hand brake,Then by turning the small nut clockwise this will allow for some small ajustment , pull up on the hand brake lever and check, (note do not screw the small nut off the end of the thread ,as it is a pain to get it back : )If there is no great improvement wind the small nut back till it's almost off the end.This will allow the cables to be at their slackest adjustment Step 3 Jack the rear of the car up till the wheels are clear of the ground, Place on stands and remove wheels, 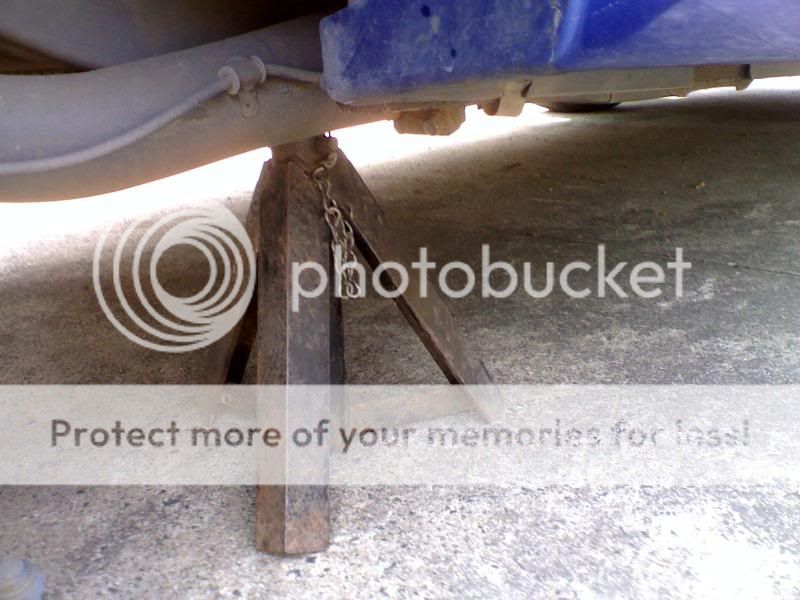 . Step 4 Remove brake caliper retaining bolts and slide caliper off (Note; there is no need to disconnet brake lines) ' Step 5 Remove large phillips head screw from rotor, this my take some doing and a impact driver may be required, also at this point I would soak the rotor centre ware it mounts the hub with Penetrene or simular as the build up of rust paint and grime can cause the rotor to jam on the hub, allgoing well the rotor should now come off the hub or some sharp tapping with a hammer around the hub and rotor may be required. 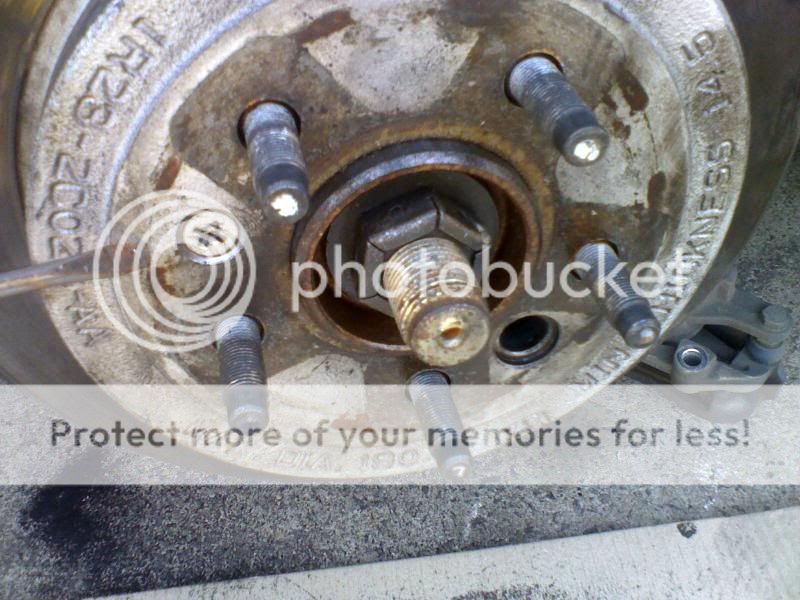 .  . Step 6 Once the rotor is removed you will see the the adjuster & outer handbrake ring.the ring is secured by a clip at the opposite end to the adjuster, 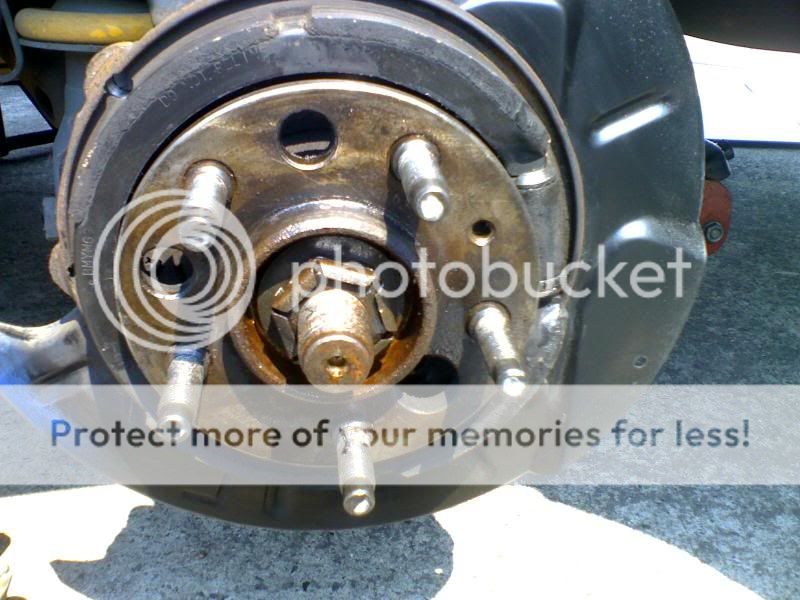 . This is easly removed by inserting a blade screwdriver between the shoe and the hub and gentely easing it away from the adjuster till clear of the clip. Once the ring is clear of the retaining clip it can be swug outwards towards yourself for removal. 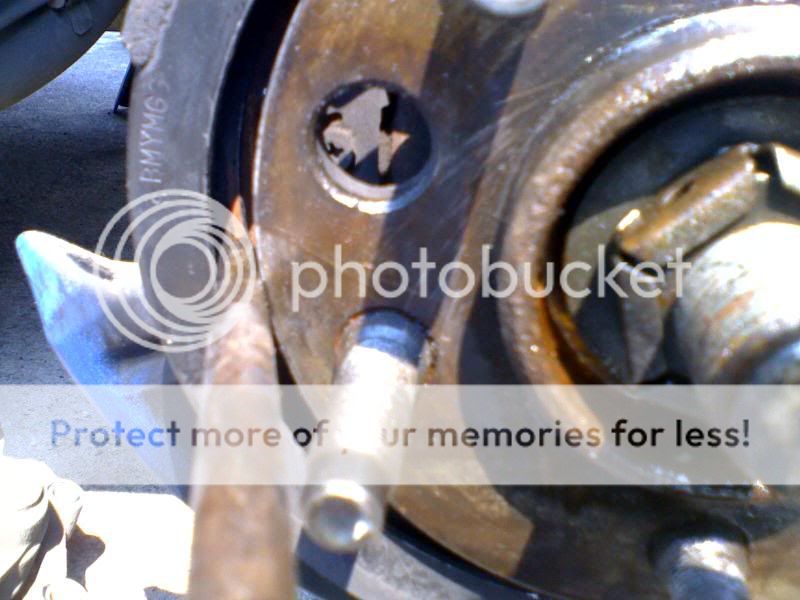 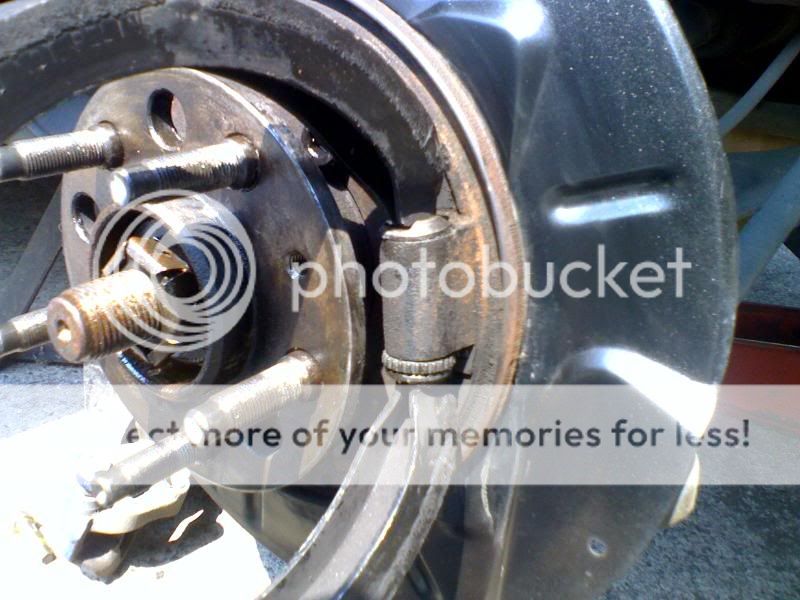  Step 7 At this point inspect the shoe on the outer ring for ware and replace if required. disassemble the ajuster clean repack with grease noteing how it came apart, slot and small pin to the top, adjuster to the bottom (make sure the adjuster is free to unscrew it self before refitting) 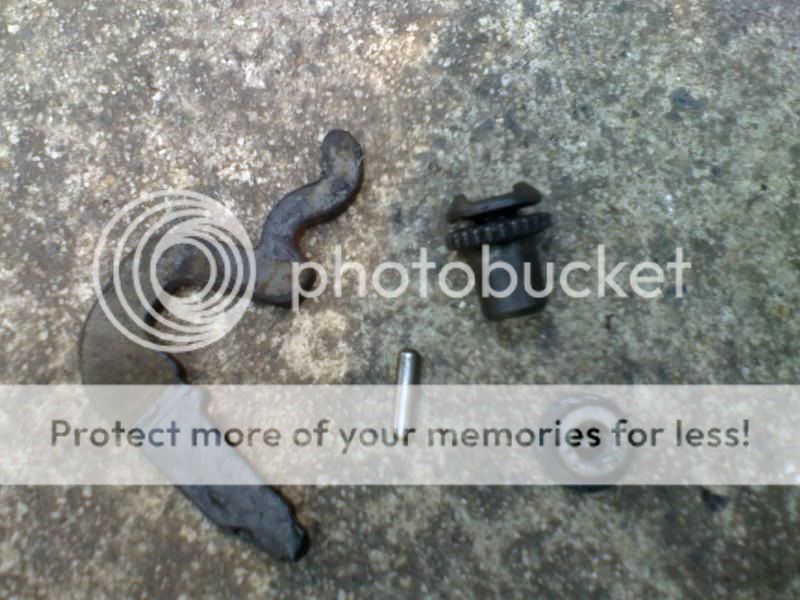 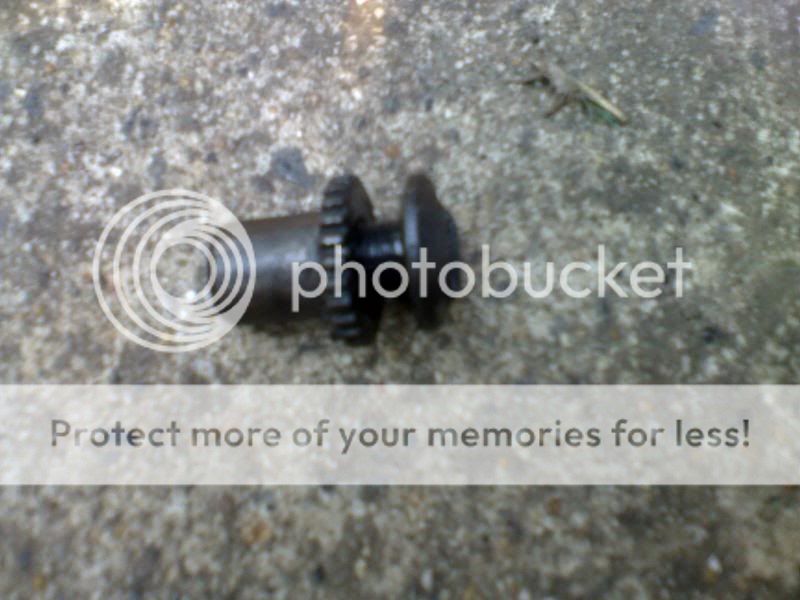 Step 8 Reassemble is the reverse of what you have just done, Note; when you slide the ring back on to the adjuster have the slots facing outwards and they should turn back inwards with the ring to be fitted back to the retaing clip. Also at this point I would clean with emery paper or file the build up on the hub center to allow easy refitting of the rotor 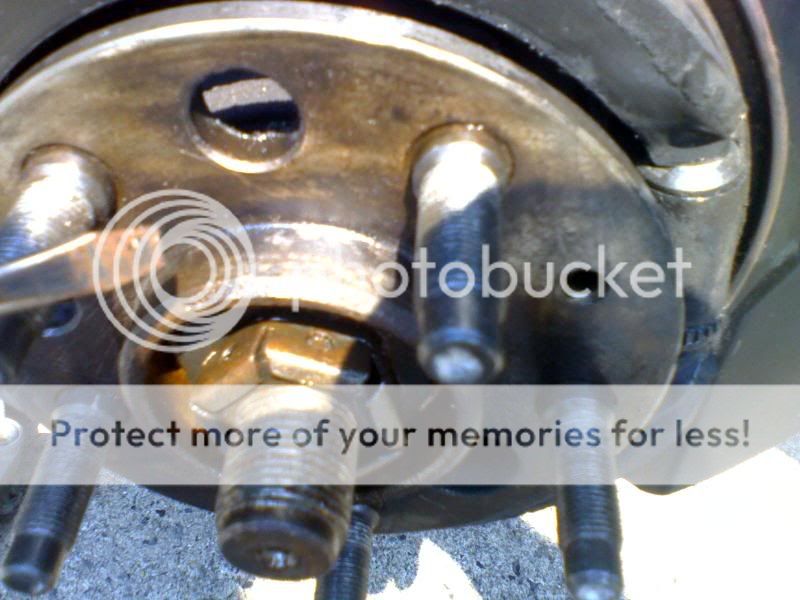 Step 9 With the adjuster screwed all the way in there should be plenty of room for the rotor to freely spin. by screwing the ajduster out a few turns at a time removing the rotor and spinning each time you should be able to find a point ware the handbrake shoe makes contact with the internal rotor but does not bind up as to lock the Rotor, When this point is reached thats about all you can do, Refitt the large phillips head screw and repeat on opposite side Step 10 Clean caliper bolts and re apply a coat of lock tight secure calipers back to vechical 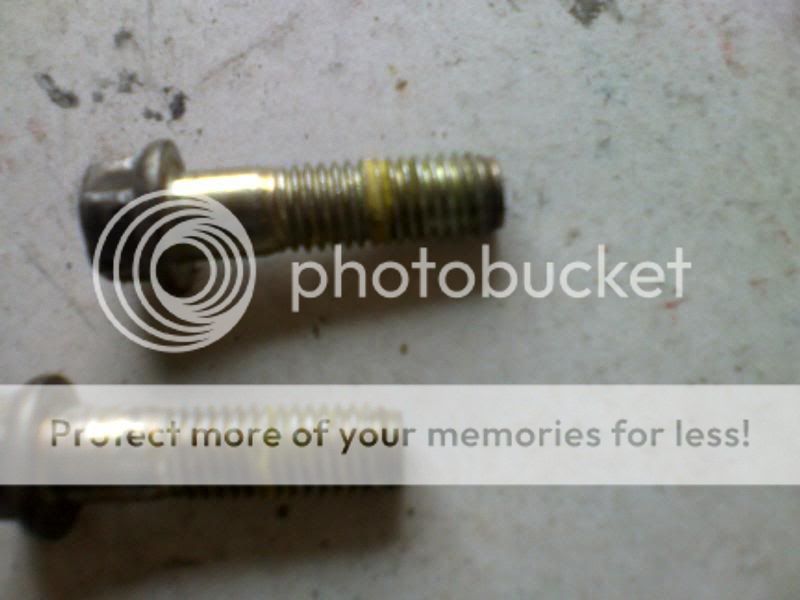 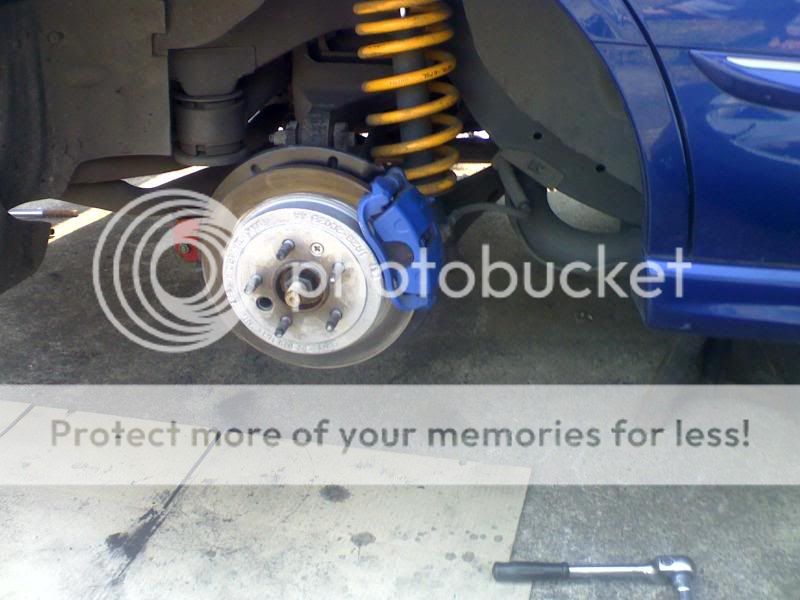 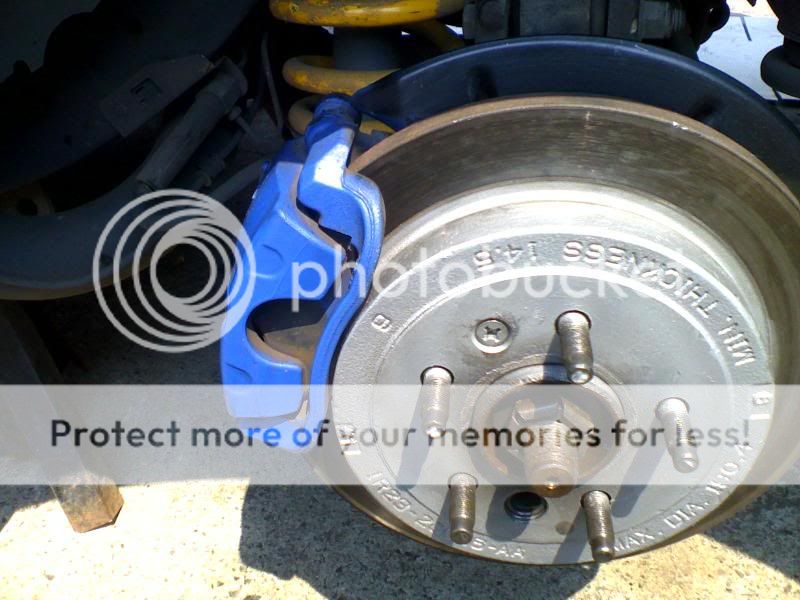 Replace wheels Step 11 Back inside the car you can now fine tune the adjustment with the threaded adjuster and small nut hopefully this should give you some sort of hand brake Note it may be nessasary to redo step 9 to gain optimun stoppage 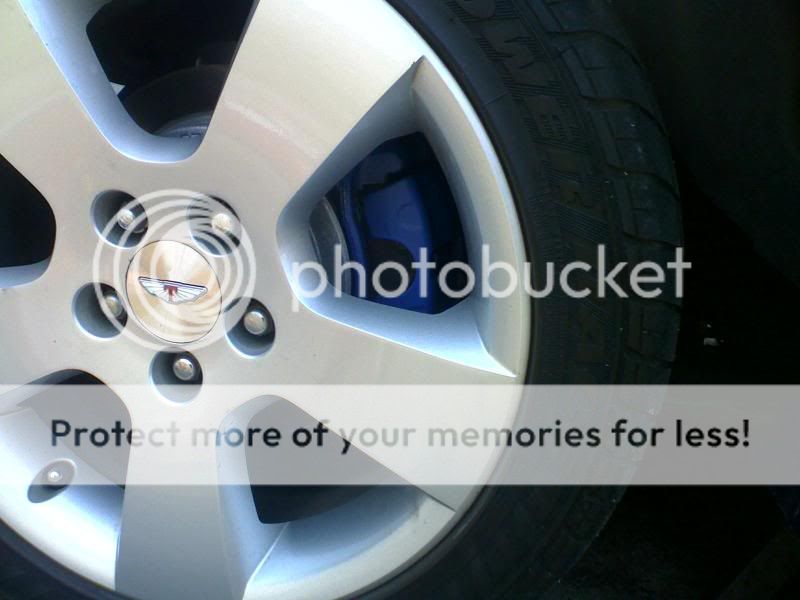 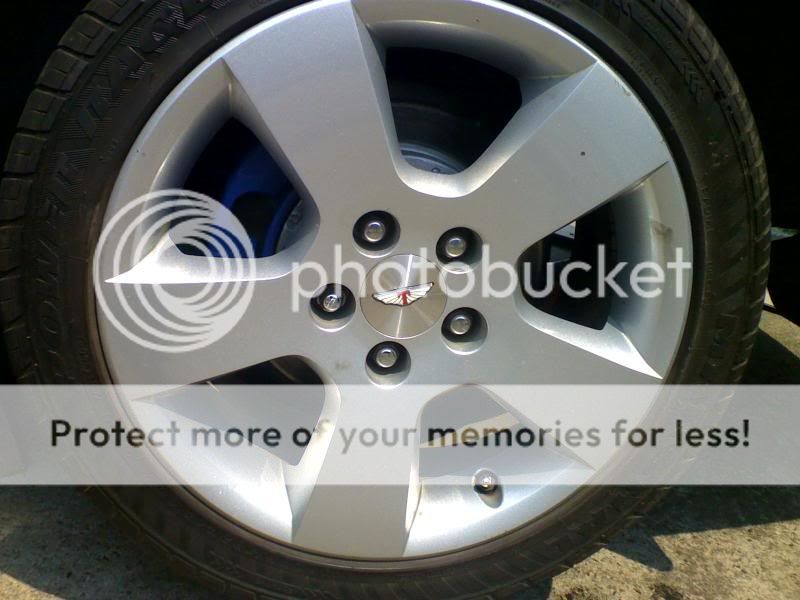 NOTE; this is a guide only and if you dont feel you are compentent enough to do this seek out professional help
__________________
........Age and treachery will ALWAYS overcome youth and skill....... CORTINA 250 2V POWER soon to be AUXR8 Windsor pwrd .............WINDSOR WARLORD WHO CARRIES THE CLEVO MAFIA AND BROKEN BOSSES... .........................  ......................... .........................Quote:
|
|||

|

|
|
17-02-2009, 05:48 PM
|
#2 | ||
|
AU DIE HARD
Join Date: Nov 2005
Location: Between 2nd and 5th gear
Posts: 5,073
|
yes I am still on holidays and was Bored
 Painting Painting calipers and hubs is optional I also rang a mate at Ford to make sure there is no easyer way there aint, and there is no special ajusting tool either |
||
|
|
|
|
17-02-2009, 06:03 PM
|
#3 | ||
|
Irregular member

Join Date: Dec 2004
Location: Melbourne
Posts: 3,941
|
Thanks for that Whoosha, I'd like to have a go at this one day but I am too scared, hehe. Any chance of a photo of the brake calipers being removed?
__________________
2000 AU II FAIRLANE 75th ANNIVERSARY - big and shiny My hovercraft is full of eels! Movie Car Chase of the Week: Gene Hackman driving a 1971 Pontiac LeMans to chase an elevated train in The French Connection (1971). |
||
|
|
|
|
17-02-2009, 06:12 PM
|
#4 | ||||
|
AU DIE HARD
Join Date: Nov 2005
Location: Between 2nd and 5th gear
Posts: 5,073
|
Quote:
__________________
........Age and treachery will ALWAYS overcome youth and skill....... CORTINA 250 2V POWER soon to be AUXR8 Windsor pwrd .............WINDSOR WARLORD WHO CARRIES THE CLEVO MAFIA AND BROKEN BOSSES... ......................... .........................Quote:
|
||||
|
|
|
|
17-02-2009, 06:41 PM
|
#5 | ||
|
When in doubt, GAS IT!!

Join Date: Sep 2006
Location: Lower Eyre Peninsula, SA
Posts: 3,018
|
Don't get me wrong here, that's an excellent "how to" and well done Woosha for making the effort and if I had to unfreeze the adjusters or change the pads I'd be right back here to follow your instructions but that's a long and tedious job which would give me the chits and not one I'd want to tackle unless absolutely necessary. When I did the 'lanes' handbrake yesterday all I did once the wheels were off ( one at a time of coarse) was pop out the rubber gromet opposite the big phillips head screw and rotated the the hole to the rear just below horizontal then just attacked the adjuster from there with a flat screwdriver. Once you've located the adjuster it's relatively easy to wind the adjusters out. I used a torch to initially spot the toothed adjuster then just did it by feel. Handbrake is perfect now and it took me all of about half and hour from when I stepped out the front door to when I went back in the house.
Bushbasher
__________________
. HERS- BFIII Wagon Gold, alloys, dual fuel, bullbar, big tow pack, trans cooler, fully rebuilt HD suspension, Clarion, alarmed, full 2 1/2" sports system, mint body MINE- AUII Forte Meteorite, dual fuel but otherwise bog stock. MINE- AUII Fairlane Sportsman Liquid Silver over meteorite,HIDs', Airhog, Eagle Leads, dual fuel, custom rear springs, BA slotted discs + a second one for spares . Last edited by Bushbasher; 17-02-2009 at 06:47 PM. |
||
|
|
|
|
17-02-2009, 07:51 PM
|
#6 | |||
|
Next upgraded Mk1 Leopard

Join Date: Jan 2005
Location: Sydney, in the burbs
Posts: 4,913
|
Quote:
UK
__________________
Plastic Surgery 1 AUII Monsoon Blue How 2's: Change rear view mirror, Install backfire valve, Change foam front seats, Install auto transmission cooler, Replace Trans Shift Globe, Remove front door Trim, Paint AU headlights, install door spears, Premium Rear Parcel Shelf, go here...
 |
|||
|
|
|
|
17-02-2009, 11:01 PM
|
#7 | |||
|
Miami Pilot
 
Join Date: Jan 2005
Location: ACT
Posts: 21,703
|
Quote:
__________________
-----------------------------------------------------------------
The Hammer: FG GTE | 376rwkw | 1/4 mile 11.793 @ 119.75mph 1.733 60' (4408lb) 1 of 60 FG MK1 335 GTEs (1 of 118 FG Mk 1 & 2 335 GTEs). Mods: Tune, HSD/ShockWorks, black GT335 19 staggered replicas with 245 & 275/35/19 Michelin Pilot sport 5s Daily: BF2 Fairmont Ghia I6 ZF, machine face GT335 19 staggered Replicas with 245s and 275s, Bilsteins & Kings FPV 335 build stats: <click here> Ford Performance Club ACT |
|||
|
|
|
| This user likes this post: |
|
17-02-2009, 11:35 PM
|
#8 | |||
|
AU DIE HARD
Join Date: Nov 2005
Location: Between 2nd and 5th gear
Posts: 5,073
|
Quote:
:
|
|||
|
|
|
|
18-02-2009, 09:18 AM
|
#9 | ||
|
Boost Addict
Join Date: Jan 2005
Location: North Brisbane
Posts: 1,151
|
same method applies to live axle ;)
__________________
N12 Pulsar - sold Gen1 Liberty Turbo - sold VP Commodore Turbo - sold LN65 Hilux Turbo - sold EL31 Corolla Turbo - sold Ford AU Ute Turbo - sold Ford AU XR8 Sedan - 5.4l V8 Turbo (in the build) Ford BA XR6T Ute - daily driver Ford FG XR6T Sedan - cruiser do you see a general trend? I DO  Can't live with it, can't live without it! |
||
|
|
|
|
18-02-2009, 09:36 AM
|
#10 | |||
|
Back to Le Frenchy

Join Date: Feb 2005
Location: Back home.....
Posts: 13,346
|
Added to the AU useful threads guide.
__________________
Quote:
07 Renault Sport Megane F1 Team R26 #1397
|
|||
|
|
|
|
18-02-2009, 09:26 PM
|
#11 | ||
|
Blue Blooded

Join Date: Sep 2005
Location: Melbourne
Posts: 199
|
Thanks Whoosha!! the back part I knew but could never find anything on the handle to adjust...(I should have looked harder!!), looks like I have something to do this weekend. Cheers
|
||
|
|
|
|
22-02-2009, 04:51 PM
|
#12 | |||
|
AU DIE HARD
Join Date: Nov 2005
Location: Between 2nd and 5th gear
Posts: 5,073
|
 : : : : Just a little more info. for the ones who still wonder if they should attempt the job...Pulling it completly apart gave me a better understanding of how it all works so for me made it just a bit easyer to get my head around it .. Here are the pictures of the caliper bolts to be removed. 15mm actually (was close) 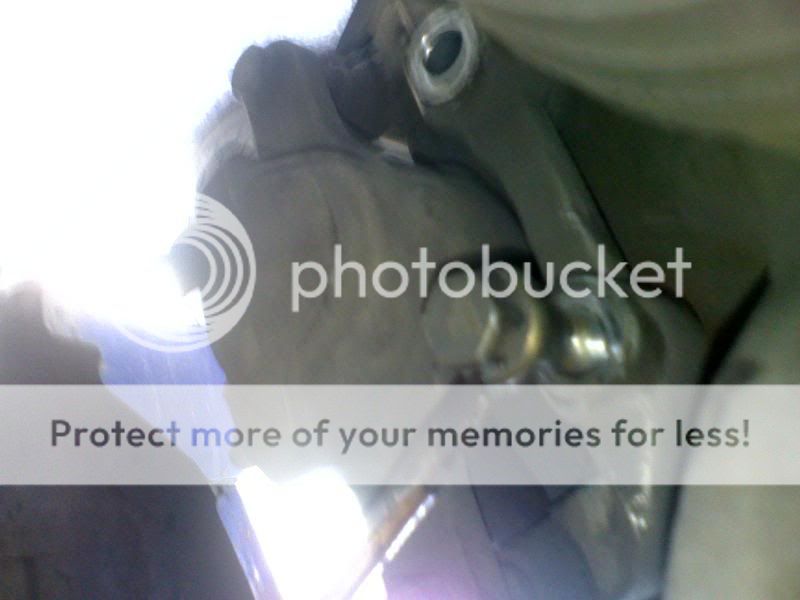 .  As others have mention some ajustment can be made through the inspection hole, (as mine had siezed it didn't help) remove the rubber grommets first, and with the help of a torch look through the hole for the adjuster , it can be found towards the rear of the car. 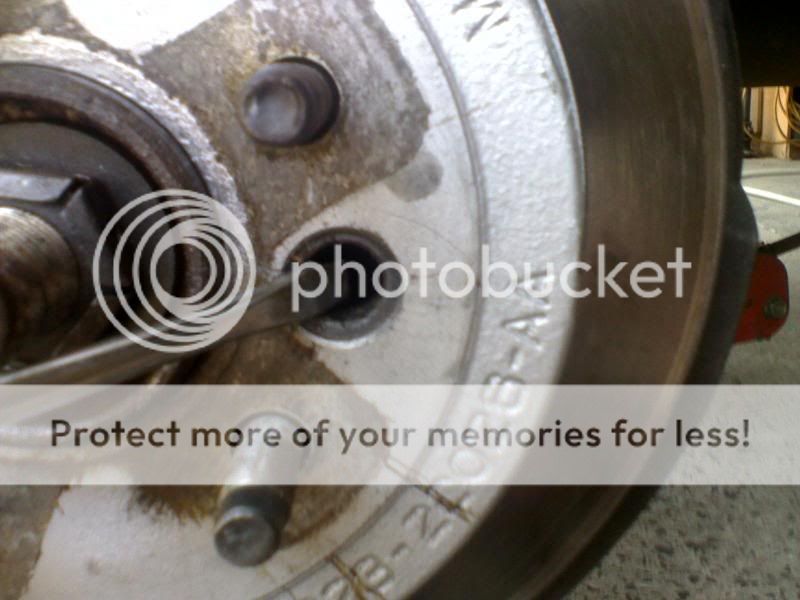 .  The left hand side of the car turns outwards (blade to the base of the toothed adjuster and lever outwards)and is relatively easy to turn . useing a small blade screwdriver The right hand side is the opposite (top of the adjuster rachet and screw inwards) this I found some what awkward to get any leverage on so I made a small adjuster tool from a tent peg .  : : I just ground a flat blade like end to one end of it then placed it in the vice and bent it on a angle to suit what I needed, worked a treat now has been put into special tool box for next time 3 clicks on the hand brake and and your all locked up  : : 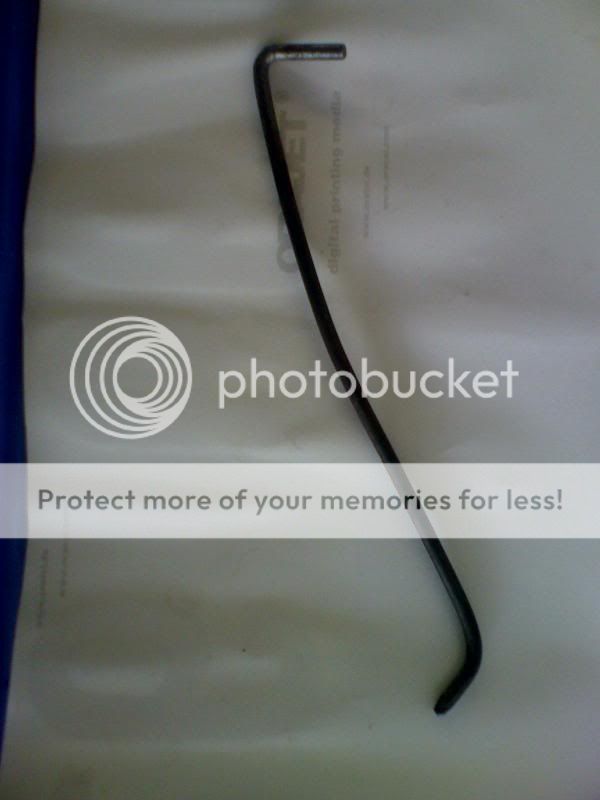
__________________
........Age and treachery will ALWAYS overcome youth and skill....... CORTINA 250 2V POWER soon to be AUXR8 Windsor pwrd .............WINDSOR WARLORD WHO CARRIES THE CLEVO MAFIA AND BROKEN BOSSES... ......................... .........................Quote:
|
|||
|
|
|
|
22-02-2009, 06:27 PM
|
#13 | ||
|
[ 5L ]

Join Date: Oct 2005
Location: North Haven, Adelaide
Posts: 2,886
|
nice brake paint, what colour is the blue called?
__________________
[ 5L ] 2001 AU series 2 xr8, 220kw, 5speed, leather interior, premium sound, narooma blue, cat back exhaust, k&n filter,willall edit,MSD coil packs, MSD leads, monroe gt gas shocks, superlow kingsprings 187rwkw (mainline) www.ignitionimages.com
|
||
|
|
|
|
22-02-2009, 06:43 PM
|
#14 | ||
|
Giddy up.

Join Date: Dec 2004
Location: Kramerica Industries.
Posts: 15,637
|
I think we should organise a day, and call it "Whoosha" day, where all us AU owner's can bring our beloved AU's and get whoosha to work his magic and we could have a handbrake that actually work's,lol.
It may need to be an annual event though, lolololol. |
||
|
|
|
| This user likes this post: |
|
22-02-2009, 07:09 PM
|
#15 | |||||
|
AU DIE HARD
Join Date: Nov 2005
Location: Between 2nd and 5th gear
Posts: 5,073
|
Quote:
it is K&H Ford light blue engine enamel heat proof to 300cQuote:
:
__________________
........Age and treachery will ALWAYS overcome youth and skill....... CORTINA 250 2V POWER soon to be AUXR8 Windsor pwrd .............WINDSOR WARLORD WHO CARRIES THE CLEVO MAFIA AND BROKEN BOSSES... ......................... .........................Quote:
|
|||||
|
|
|
|
22-02-2009, 07:13 PM
|
#16 | |||
|
Giddy up.
Join Date: Dec 2004
Location: Kramerica Industries.
Posts: 15,637
|
Quote:
I like your way of thinking, lol, don't forget the AFF discount though, |
|||
|
|
|
|
23-02-2009, 09:48 AM
|
#17 | |||
|
Irregular member
Join Date: Dec 2004
Location: Melbourne
Posts: 3,941
|
Thanks for the further pics and instructions, Whoosha.
Quote:
__________________
2000 AU II FAIRLANE 75th ANNIVERSARY - big and shiny My hovercraft is full of eels! Movie Car Chase of the Week: Gene Hackman driving a 1971 Pontiac LeMans to chase an elevated train in The French Connection (1971). |
|||
|
|
|
|
24-02-2009, 09:57 PM
|
#18 | |||
|
Donating Member
Join Date: Aug 2006
Posts: 5,142
|
Quote:
I agree dauphin, fear of screwing up is the one thing holding me back  : :
|
|||
|
|
|
| This user likes this post: |
|
31-03-2009, 05:25 PM
|
#19 | ||
|
Giddy up.
Join Date: Dec 2004
Location: Kramerica Industries.
Posts: 15,637
|
hey guy's I had a go at attempting this today and it has worked as per the way described but one question, I didn't have to take the hub off as I went through the little hole where the rubber grommet is, and used a flat blade scredriver to adjust it, but I turned it untill it wouldn't turn no more and then realised that I went to far and couldn't rotate the hub assembley, so I backed it of a little untill I could rotate the hub by hand but with some force, would this be allright or does it need to be able to spin really freely????.
|
||
|
|
|
| This user likes this post: |
|
01-04-2009, 02:08 PM
|
#20 | |||
|
Former BTIKD

Join Date: Mar 2005
Location: Sunny Downtown Wagga Wagga. NSW.
Posts: 53,197
|
Quote:
Get in the car and take it to the 'MAN' to fix it whilst you sit down and watch the telly!
__________________
Dying at your job is natures way of saying that you're in the wrong line of work.
|
|||
|
|
|
|
01-04-2009, 05:29 PM
|
#21 | |||
|
Miami Pilot
Join Date: Jan 2005
Location: ACT
Posts: 21,703
|
Quote:
__________________
-----------------------------------------------------------------
The Hammer: FG GTE | 376rwkw | 1/4 mile 11.793 @ 119.75mph 1.733 60' (4408lb) 1 of 60 FG MK1 335 GTEs (1 of 118 FG Mk 1 & 2 335 GTEs). Mods: Tune, HSD/ShockWorks, black GT335 19 staggered replicas with 245 & 275/35/19 Michelin Pilot sport 5s Daily: BF2 Fairmont Ghia I6 ZF, machine face GT335 19 staggered Replicas with 245s and 275s, Bilsteins & Kings FPV 335 build stats: <click here> Ford Performance Club ACT |
|||
|
|
|
|
02-04-2009, 02:01 PM
|
#22 | ||||
|
AU DIE HARD
Join Date: Nov 2005
Location: Between 2nd and 5th gear
Posts: 5,073
|
Quote:
 : : ------------------------------------------------------------------------ Just sent you a PM galaxy, but JC has it coverd, I was in transit to sunny make that grey n Wet Brisvegas
__________________
........Age and treachery will ALWAYS overcome youth and skill....... CORTINA 250 2V POWER soon to be AUXR8 Windsor pwrd .............WINDSOR WARLORD WHO CARRIES THE CLEVO MAFIA AND BROKEN BOSSES... ......................... .........................Quote:
|
||||
|
|
|
|
02-04-2009, 02:42 PM
|
#23 | ||
|
Afterburner + skids =

Join Date: Dec 2004
Location: Skidsville
Posts: 12,128
|
You in Brisbane at the moment Whoosha?
__________________
Speed Kills. So buy an AU XR8 and live forever. Oo\===/oO |
||

|
|
|
08-04-2009, 06:56 AM
|
#24 | ||
|
Starter Motor

Join Date: Apr 2009
Location: Gold Coast
Posts: 13
|
Thanks Whoosha for the comprehensive handbrake disassembly instructions. My AU Ghia has displayed a nasty symphony of squeals and groans for most of it's life after I drove 20 odd clicks with the brake partly on. No Ford workshop has been able to fix it although I paid several hunded dollars for parts while under warranty. I now have no handbrake at all and to stop the noise all I can do is pull up on the lever. Could you tell me what needs to be replaced please. I am no longer able to perform maintenance/repair so I would need someone in Melbourne East to do the work if any one can recommend a workshop please. Thanks.Ray.
Last edited by VF805; 08-04-2009 at 06:57 AM. Reason: To add my name. |
||
|
|
|
|
16-04-2010, 04:52 PM
|
#25 | ||
|
Starter Motor
Join Date: Mar 2010
Posts: 1
|
Apart from all the adjustments mentioned above, does anyone have still have trouble with the handbrake? I have replaced the cable from the interior lever to the front of the rear axle and checked the handbrake pads which seem adjusted correctly, but the travel to get the handbrake to work is right at the end and is only just, and i mean just, holding the car. Has anyone had to replace the rear section of the cable, the one from the rear axle to each wheel?
|
||
|
|
|
|
16-04-2010, 05:48 PM
|
#26 | ||
|
Giddy up.
Join Date: Dec 2004
Location: Kramerica Industries.
Posts: 15,637
|
^^ I have had no trouble what so ever since adjusting the handbrake, It work's a treat now and holds the vehicle solidly on any slope.
|
||
|
|
|
|
30-05-2010, 07:20 PM
|
#27 | ||
|
Starter Motor
Join Date: Dec 2009
Posts: 4
|
Noise is usaully an indication that something is wrong even minor.
Rear wheel used to squeal for first 100m after a few days sitting still, pull on handbrake and it stops, I knew it was the handbrake, also rear disk rotor were originals (~160k kms) and had a groove where footbrake pads rub. Replaced the rotors (~$100 ea) and new handbrake shoes (~$100 set) re-adjusted and now no more noise even from the foot brake (used to squeal slightly at Maccas drive through), and also braking effort to stop car is much reduced. Try that! 
|
||
|
|
|
| This user likes this post: |
|
07-02-2014, 08:40 AM
|
#28 | ||
|
Starter Motor
Join Date: Jan 2014
Location: Tauranga, New Zealand
Posts: 10
|
I need this done on the Falcon, will ask around first for cost from a Garage before attempting it myself. thanks Woosha...
|
||
|
|
|
|
07-05-2014, 02:37 PM
|
#29 | ||
|
Regular Member
Join Date: Feb 2014
Posts: 71
|
Hi i adjusted handbrake on my au wagon yesterday and thought i might add a small comment - apologies for any repetition
to tighten the brakes turn in a clockwise direction (as if looking from above) so if you are working on - -left/ drivers side, tighten by levering toward yourself - right side, tighten by pushing away levering the screwdriver only worked for me when turning toward myself, to turn the other way i gave the screwdriver a small tap with a hammer to turn the adjustor cheers |
||
|
|
|
|
11-06-2015, 04:03 PM
|
#30 | |||
|
Matakana NZ
 
Join Date: Aug 2005
Location: Matakana NZ
Posts: 3,668
|
Quote:
__________________
SOLD : BA XR8 4 Speed Auto in Mercury Silver, Bluepower CIA, Full Diffilipo Big Boy Quad System, Tune, 4.11 Diff Gears, FPV Starter Button, FPV GT Rear Spoiler, Tripod Gauges, PWR Trans Cooler. 230 RWKW's. Many thanks to Chris at Bluepower Racing Developments
Hers : F6X build #150 in Ego, Stock as a Rock, untill the warranty runs out, including the extended one. My Work Wagon AU Futura Wagon in Gold. On the Farm : Ford 6600 Tractor |
|||
|
|
|


 Linear Mode
