
|
|
 |
|
|
|
Welcome to the Australian Ford Forums forum. You are currently viewing our boards as a guest which gives you limited access to view most discussions and inserts advertising. By joining our free community you will have access to post topics, communicate privately with other members, respond to polls, upload content and access many other special features without post based advertising banners. Registration is simple and absolutely free so please, join our community today! If you have any problems with the registration process or your account login, please contact us. Please Note: All new registrations go through a manual approval queue to keep spammers out. This is checked twice each day so there will be a delay before your registration is activated. |
|
|||||||
 |
|
|
Thread Tools | Display Modes |
|
|
#1 | ||
|
Regular Member
Join Date: May 2009
Posts: 276
|
Well this has been a long time coming but seeing as it's an average winters day in Melbourne I thought I'd give a build thread a shot, so here goes. So for any of you that don't know what the Federation Insurance car is this is a model of it
 And this is pretty much where I go serious Easter 2011.  |
||
|
|

|
|
|
#2 | ||
|
Regular Member
Join Date: May 2009
Posts: 276
|
 Let's see if this works. Front cut of donor car |
||
|
|

|
|
|
#3 | ||
|
FF.Com.Au Hardcore
Join Date: Nov 2005
Location: Perth
Posts: 755
|
Just had a look through the full albumn, thats some pretty serious panel work. looks like your beater is doing a good job though. looks like what landau stable does on a reg basis.
if you put [img]"http://s625.photobucket.com/albums/t...fronttidy1.jpg"[/img] your pics will show up on the page also. ( take out the " " ) as such 
|
||
|
|

|
|
|
#4 | ||
|
Moderator Ford Coupe Club
Join Date: Dec 2004
Location: Vic
Posts: 3,905
|
I'm so looking forward to this one being completed. The Federation Insurance coupe is the best looking coupe to ever grace a race track.
About the time my coupe was being repainted I contemplated having it painted Black and doing a Federation replica. I realized pretty quickly I wouldn't have the budget to do it justice so abandoned that idea.
__________________
Mitsubishi ASX Auto, White - Daily Commuter XC Fairmont Coupe, 351 4spd, Graphite Grey - The Antidote http://www.fordcoupeclub.org "If you don't know where you're going, any road will take you there" George Harrison 2001. |
||
|
|

|
|
|
#5 | |||
|
Regular Member
Join Date: May 2009
Posts: 276
|
Quote:
A lot of the rust repair and mods were done by me including 90% of the cut and shut. My friend has taken it from blasted shell to where iit is now. I'll give the post pics thing another go now |
|||
|
|

|
|
|
#6 | ||
|
Regular Member
Join Date: May 2009
Posts: 276
|
 Let;s see what weget now. This pic is of the front and rear of the car coming together. Once I get the hang of this I'll do multiple pics at once |
||
|
|

|
|
|
#7 | ||
|
FF.Com.Au Hardcore
Join Date: Nov 2011
Location: Southern Highlands
Posts: 1,493
|
I had a look through the album from start to finish, the car looks way better, nice body work, did you check out about the vin for the coupe when you had the sedan front put on. Very nice work it is going to look great.
|
||
|
|

|
|
|
#8 | |||
|
Regular Member
Join Date: May 2009
Posts: 276
|
Quote:
|
|||
|
|

|
|
|
#9 | ||
|
moderator ford coupe club
Join Date: Jun 2007
Posts: 6,640
|
it looks great - magnificent work
|
||
|
|

|
|
|
#10 | |||
|
Regular Member
Join Date: May 2009
Posts: 276
|
Quote:
|
|||
|
|

|
|
|
#11 | ||
|
FF.Com.Au Hardcore
Join Date: Nov 2009
Posts: 1,128
|
Before you paste the link, click on the "insert image" icon (the one right of the world icon and left of the speech bubble icon)
it will put [IMG] before and [/IMG] after your link and show the pic if you paste a link without the [IMG]'s you will just see the link ie http://s625.photobucket.com/albums/t...FedShutDS1.jpg if you use the [IMG]'s you get this using this [img]https://i625.photobucket.com/albums/tt339/Greenjgs/Fed%20Insurance%20Car/FedShutDS1.jpg[IMG] (slash removed so you can see) equals this 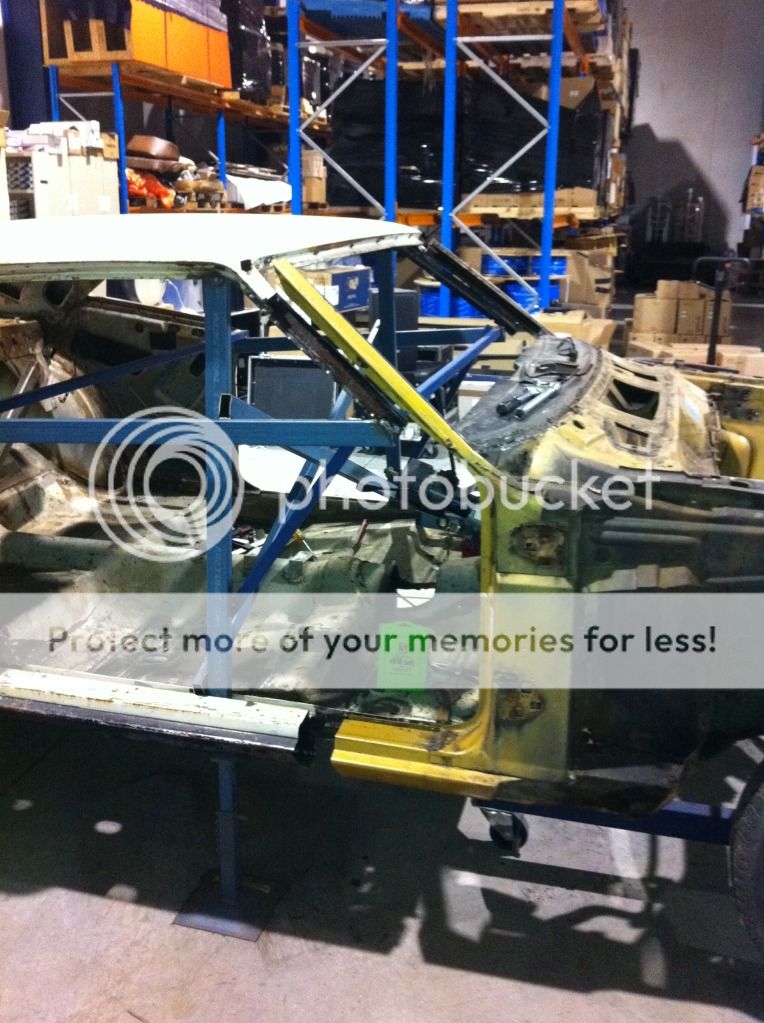
__________________
. . . . Landau Reference Booklet http://fordforums.com.au/wsm/landau/...20Booklet.html Collecting all Landau info especially photos and ID plate details for the Landau register. Please PM me anytime! --------------------------------------------------- Blue '74 Landau - 5.8L & C4 Viper '09 XR6T - 4.0L & ZF Black '08 BT50 SDX --------------------------------------------------- |
||
|
|

|
|
|
#12 | ||
|
Regular Member
Join Date: May 2009
Posts: 276
|
[img]https://s625.photobucket.com/albums/tt339/Greenjgs/Fed%20Insurance%20Car/?action=view¤t=FedRHTubinboot.jpg[IMG]
I must be thick, I cannot get the pics to show up like you guys do. Last edited by greenjgs; 17-07-2012 at 04:41 PM. |
||
|
|

|
|
|
#13 | |||
|
FF.Com.Au Hardcore
Join Date: Sep 2011
Location: Victoria
Posts: 2,182
|
Quote:
This is going to be great. Cant wait to see it up close 
|
|||
|
|

|
|
|
#14 | ||
|
Regular Member
Join Date: May 2009
Posts: 276
|
Thanks. Once I get this, (my), photo dumbness sorted I will tell the whole story. Still trying for the Club Track day in October but it's looking less likely each day.
|
||
|
|

|
|
|
#15 | ||
|
Awesome
Join Date: Oct 2007
Location: In my own little world..Everyone here knows me :)
Posts: 9,401
|
It is not working as you are not copying the whole IMG code.
On the right hand side of the image in Photobucket is an IMG code. Click on it and it will say "Copied" then paste it into your post by right clicking and pasting in the code....like this  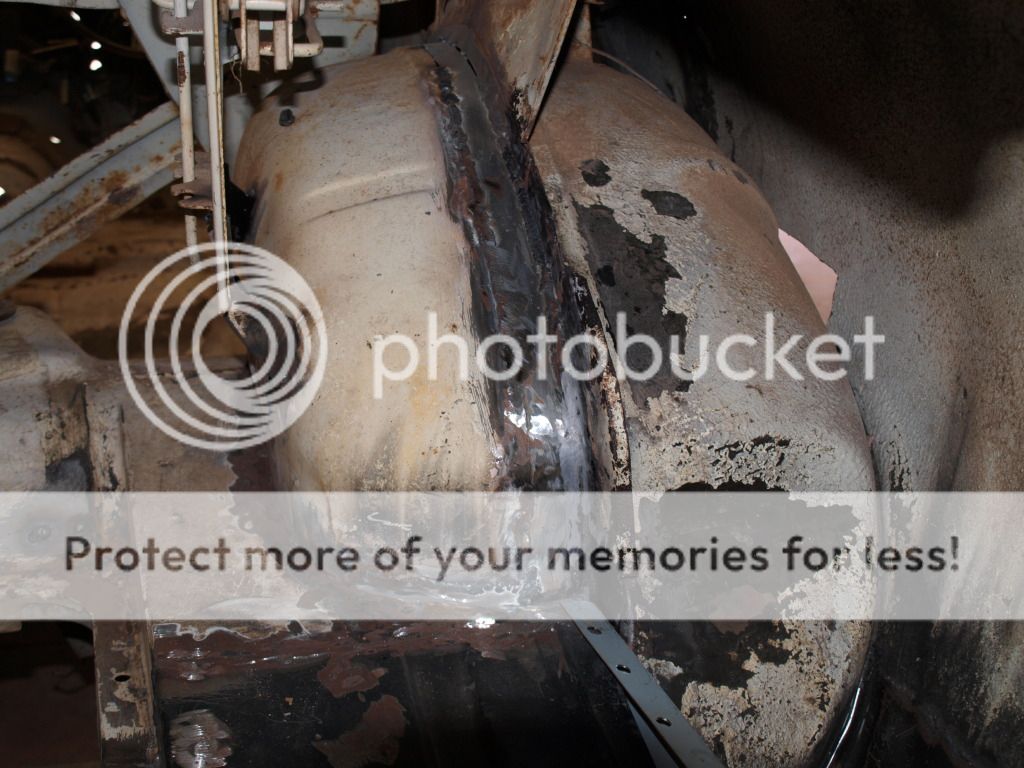
__________________
|
||
|
|

|
|
|
#16 | |||
|
Former BTIKD
 Join Date: Mar 2005
Location: Sunny Downtown Wagga Wagga. NSW.
Posts: 53,197
|
I posted this for another member a while ago, it might be of some help....
Hover your mouse over the picture you want to show, this will bring up a menu underneath the pic. Go to the bottom line on that menu where it says "Image Code" and left click on that, it will then say 'copied'....this also means 'linked'. When you want to post the picture here simply right click and 'Paste' Oh, and if you delete the picture from Photobucket it will also be deleted from wherever you pasted the link to.  Quote:
__________________
Dying at your job is natures way of saying that you're in the wrong line of work.
|
|||
|
|

|
|
|
#17 | ||
|
Regular Member
Join Date: May 2009
Posts: 276
|
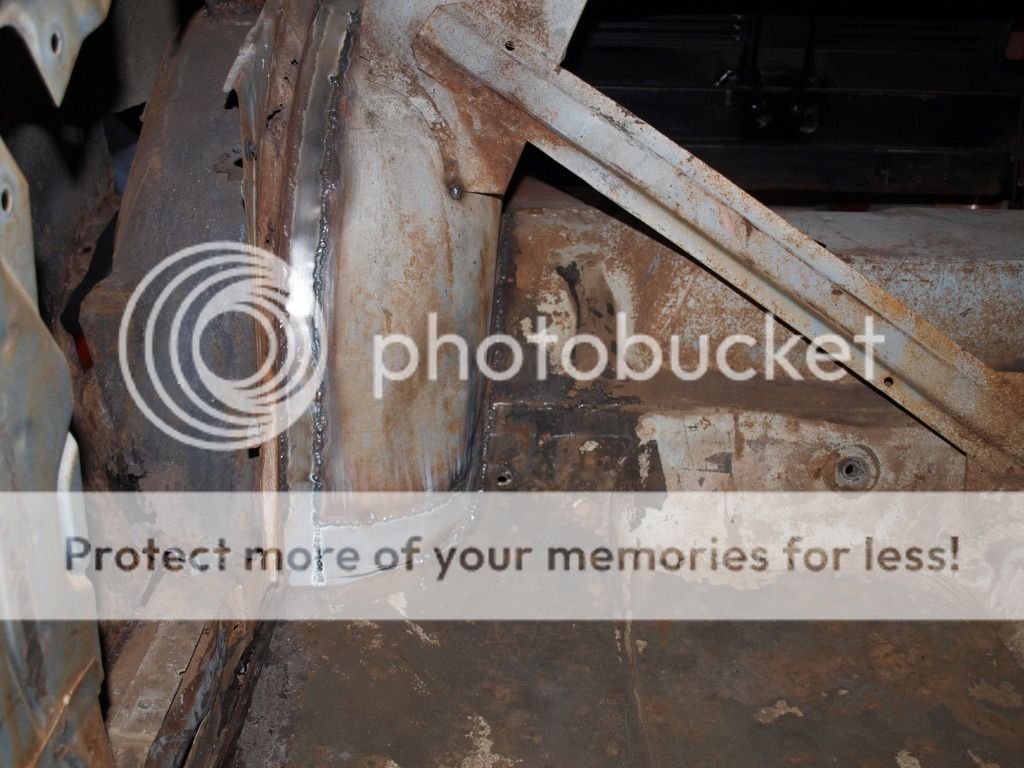
So let's see if this works. THis and the last pic I attempted to post are of the rear tub widening that was carried out on the race cars, it increases the tub clearance by 35mm
Last edited by greenjgs; 20-07-2012 at 04:55 PM. |
||
|
|

|
|
|
#18 | ||
|
FF.Com.Au Hardcore
Join Date: Nov 2005
Location: Perth
Posts: 755
|
the [img] at the end of that should be [/img]
looks like you got it sorted, will look forward to the story. |
||
|
|

|
|
|
#19 | ||
|
FF.Com.Au Hardcore
Join Date: Nov 2010
Posts: 892
|
Nope Did Not Work.
|
||
|
|

|
|
|
#20 | |||
|
Regular Member
Join Date: May 2009
Posts: 276
|
Quote:
|
|||
|
|

|
|
|
#21 | ||
|
Regular Member
Join Date: May 2009
Posts: 276
|
Ok, so let's try to move on with this. Rather than show you more depressing rust repairs I'd rather cover the race mods, so now you seen the rear tub here's some shots of what was required to make the 15 x 10 fronts turn through the full steering sweep.
  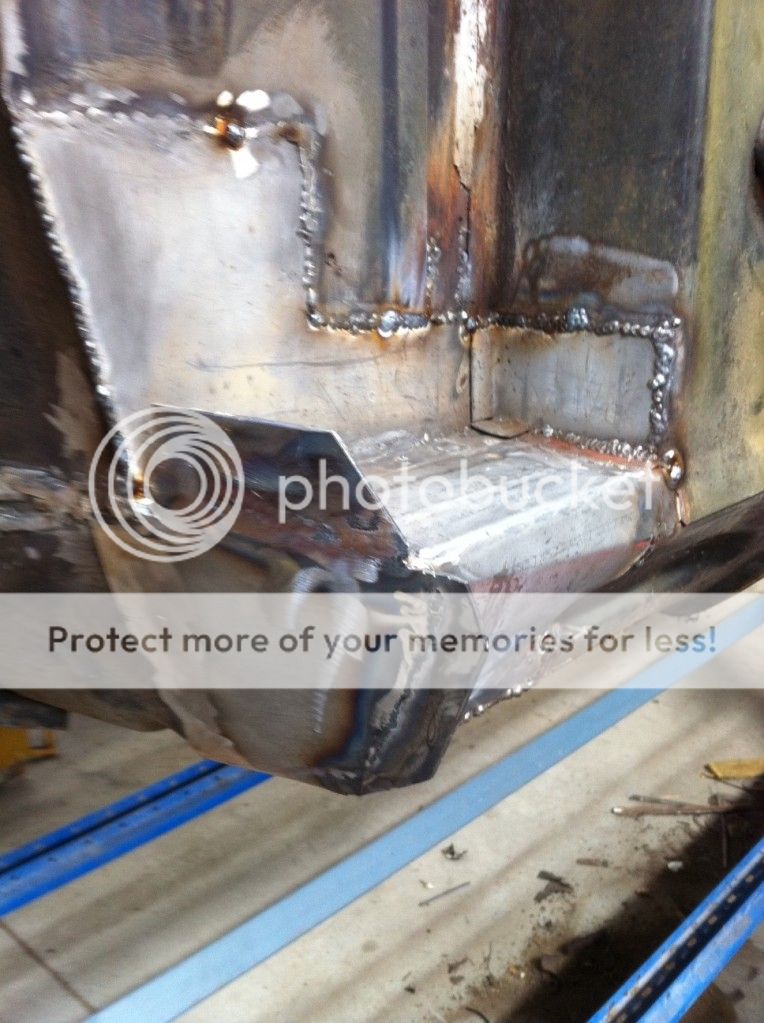 Finished ready for grinding |
||
|
|

|
|
|
#22 | ||
|
Regular Member
Join Date: May 2009
Posts: 276
|
Got it sussed, thanks folks..... Moving on.
Here's a front trial fitted to the car with the guard slipped over the top   And now the savage surgery   We ended up pushing the lip out 65mm.   And with a bit of protective black paint so we have an idea how it's going to look. |
||
|
|

|
| This user likes this post: |
|
|
#24 | ||
|
HUGE MEMBER
Join Date: May 2012
Location: Brissy Bayside
Posts: 716
|
Looking forward to the build. Nailed the pics. Good job
__________________
I would not pee on a Holden if it were on fire. I would take pics and post for your pleasure My cruiser. 1979 Zh Marquis. "T" code 351. My garage queen :(. 1980 TF Cortina Ghia Wagon. 4.1. My dog. 2011 Sierra My Daily. 2012 ZH (lol) OUTLANDER xls. 4WD CVT. Sapphire blue Wanted Borg Warner Lsd or centre. 25 spline |
||
|
|

|
|
|
#25 | ||
|
Legend!!!
Join Date: Jun 2007
Posts: 907
|
Geez!!! That's Looking good Graeme, You certainly have come a long way with it.
The amount of work you have put into it is incredible  I really like what you did with the front guards. It looks like it matches the bulging rear quater's perfectly. Cant wait to see it meself.
__________________
BARE BONES RACING BACK TO THE BONE YARD |
||
|
|

|
|
|
#26 | |||
|
Regular Member
Join Date: May 2009
Posts: 276
|
Quote:
Got some great news today, expect pics of the car in topcoat end of next week. Cheers Graeme |
|||
|
|

|
|
|
#27 | ||
|
Regular Member
Join Date: May 2009
Posts: 276
|
So to finish up the race mods in the front I have done the Lee Dystra Mustang mod to the suspension towers and added re-inforcement plates
  While doing the towers I also stitch welded the whole engine bay and strengthened the crossmember internally 
|
||
|
|

|
| This user likes this post: |
|
|
#28 | ||
|
previously SMIKXR6
Join Date: Feb 2010
Location: Sydney NSW
Posts: 772
|
Cant wait too see the end result!!
__________________
FG Falcon, Stanced , Staggered 20x11's , Venetian , plus more!.. Check it out! http://www.fordforums.com.au/showthread.php?t=11402139 |
||
|
|

|
|
|
#29 | ||
|
Regular Member
Join Date: May 2009
Posts: 276
|
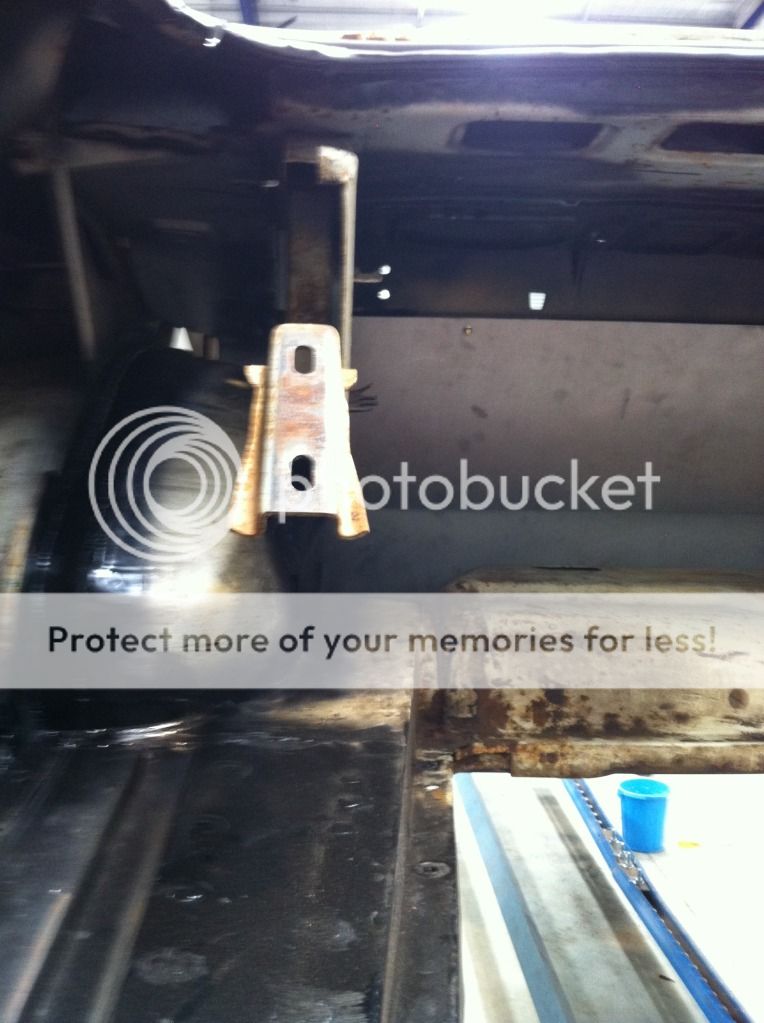
THought I'd go back to the rear of the car now and show you folks the construction of the panhard rod mount. The 1st couple of pics of the mount are on the left over floor of the donor car. Turned out to be a great way of mocking the mount up. It's a pity I don't have pics of working out the rear roll centre.
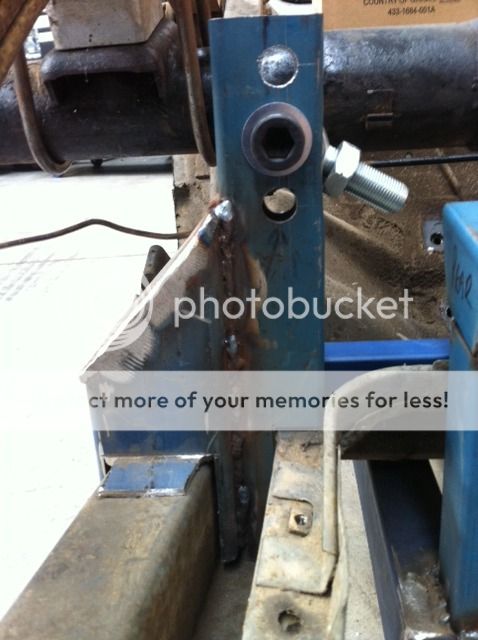 [img]https://i625.photobucket.com/albums/tt339/Greenjgs/Fed%20Insurance%20Car/PanhardRodMount12 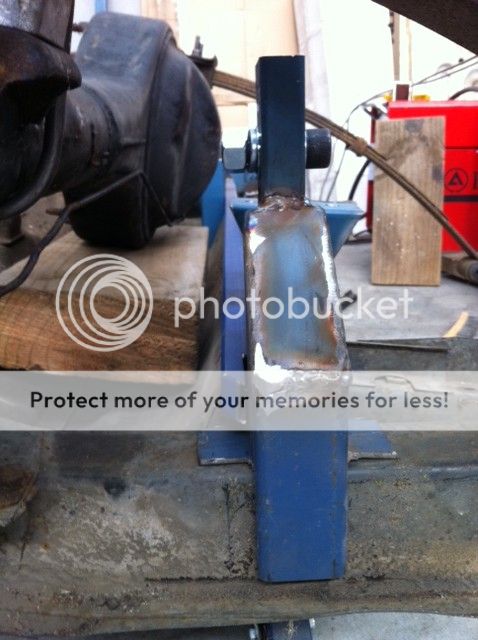 Now on the racer 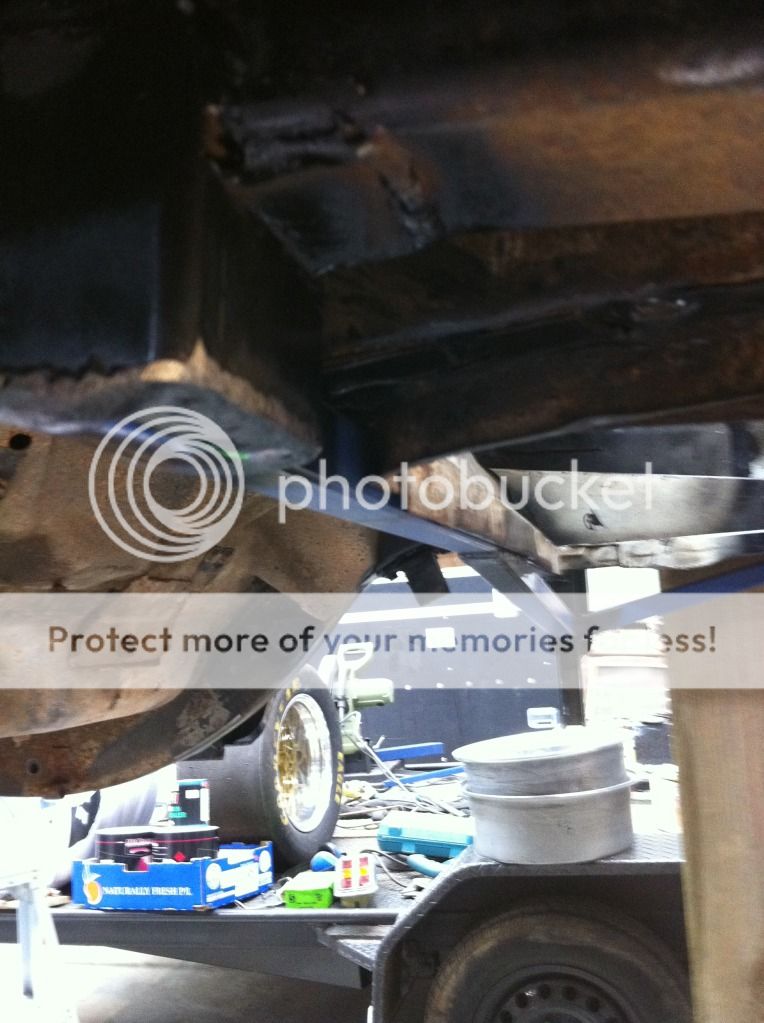 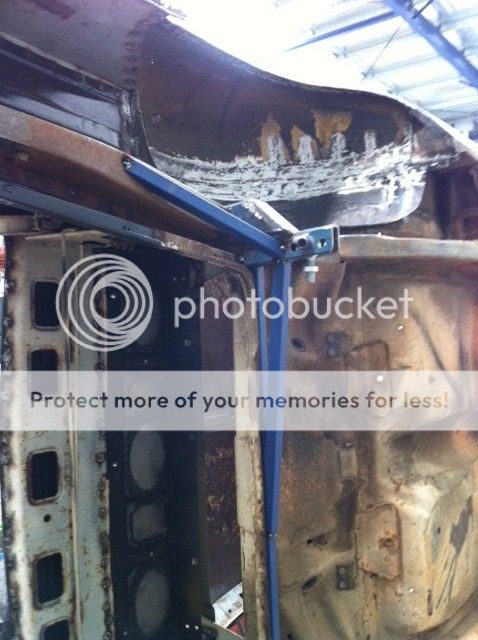
|
||
|
|

|
| This user likes this post: |
|
|
#30 | ||
|
Regular Member
Join Date: May 2009
Posts: 276
|
Next on the to do list is fire walling the boot from interior of the car. THis turned out to be surprisingly easy to do, a sheet of panel steel bent on the side if my trailer, trim it, tech scre it, weld it. Only took a couple of hours
  Stitched in 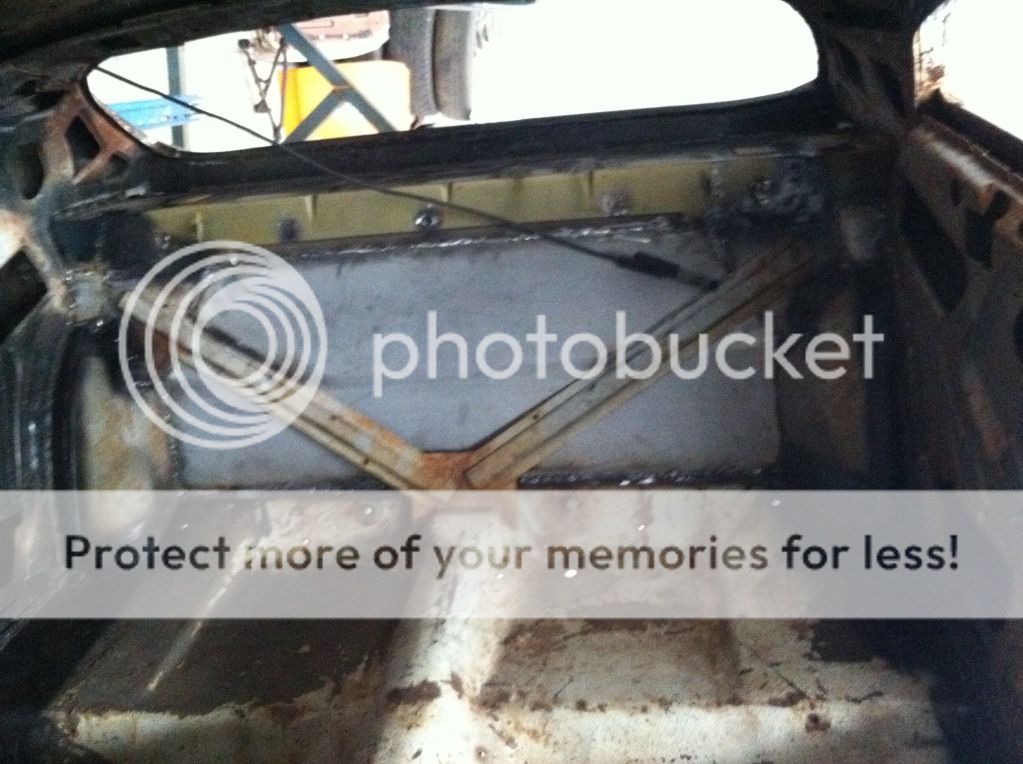 Filled in the speaker holes as well 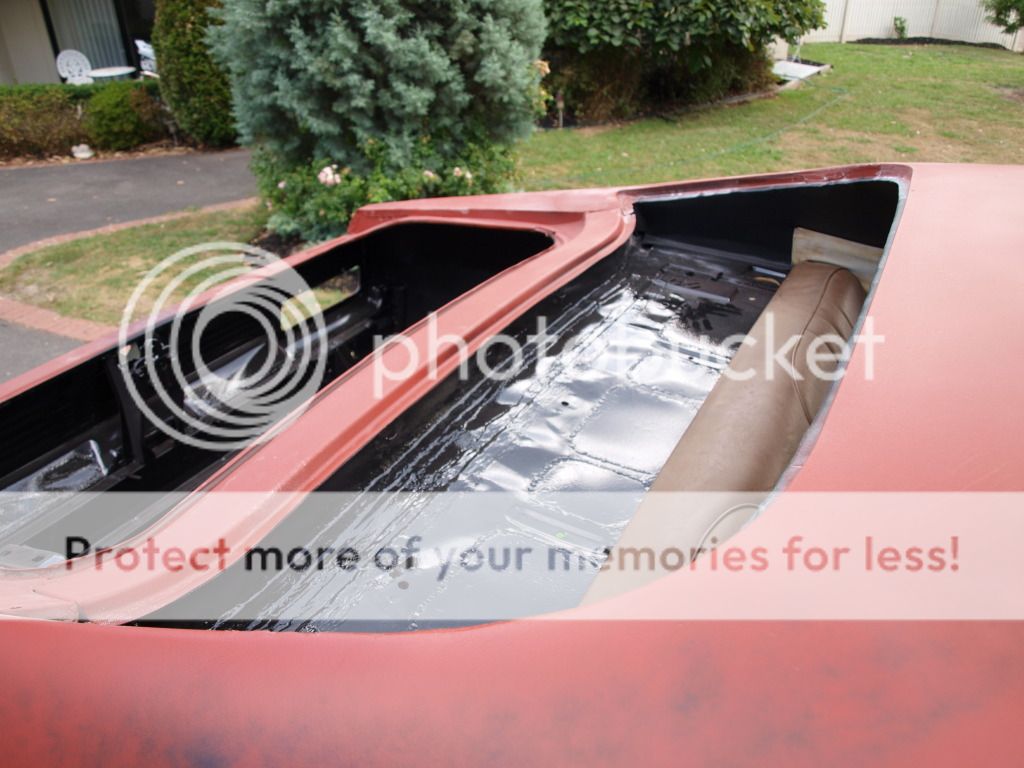
|
||
|
|

|